Learn How To Peel A Peach using this effortless, kitchen-tested technique that will deliver perfectly peeled peaches without any mess and without the need for a vegetable peeler! This foolproof method preserves every drop of that sweet summer juice while leaving you with pristine, ready-to-use fruit for your favorite peach recipes.

Note: This post contains referral links for products I recommend. As an Amazon Associate, I earn a small commission on qualified purchases, at no cost to you.
Table of Contents
Perfectly peeled peaches elevate every dish, from golden peach pie and muffins to silky peach sauce and fresh summer salads. Mastering this simple technique will save you time, frustration, and wasted fruit. After years of testing various methods, I’m sharing my foolproof, step-by-step approach to peeling peaches like a pro.
My Easy Method for Peeling Peaches
(Scroll down for the full details in the card below.)
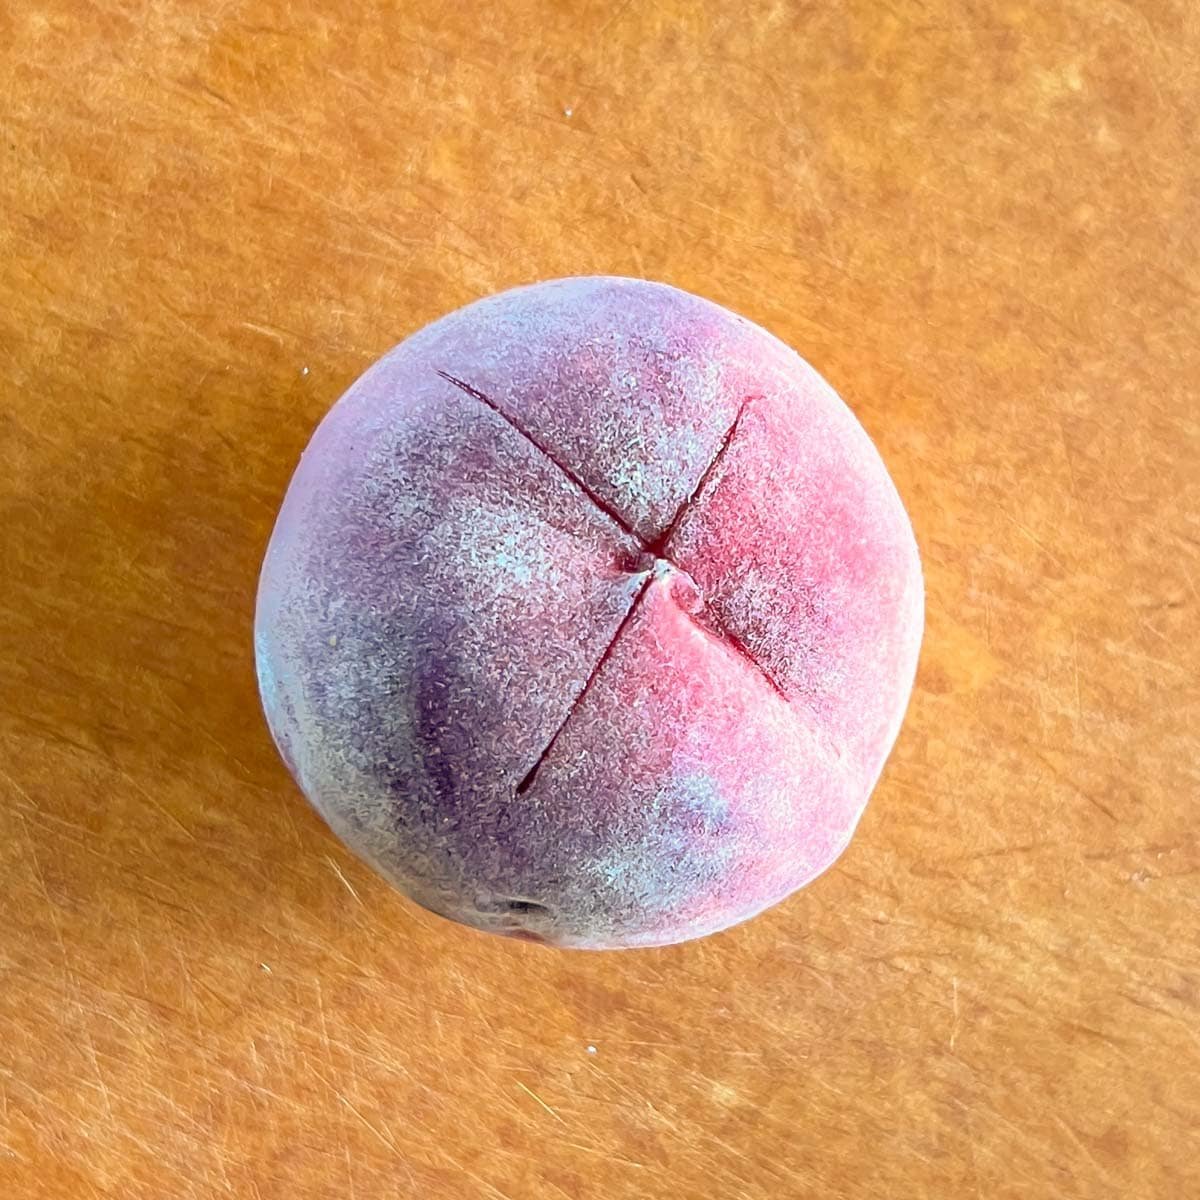
Step 1: Score the skin.
Take a sharp paring knife (or other small kitchen knife) and lightly cut a score mark (a small ‘X’) into the bottom of each peach (the side opposite the stem). This tiny cut helps the skin slip off easily during the next step.
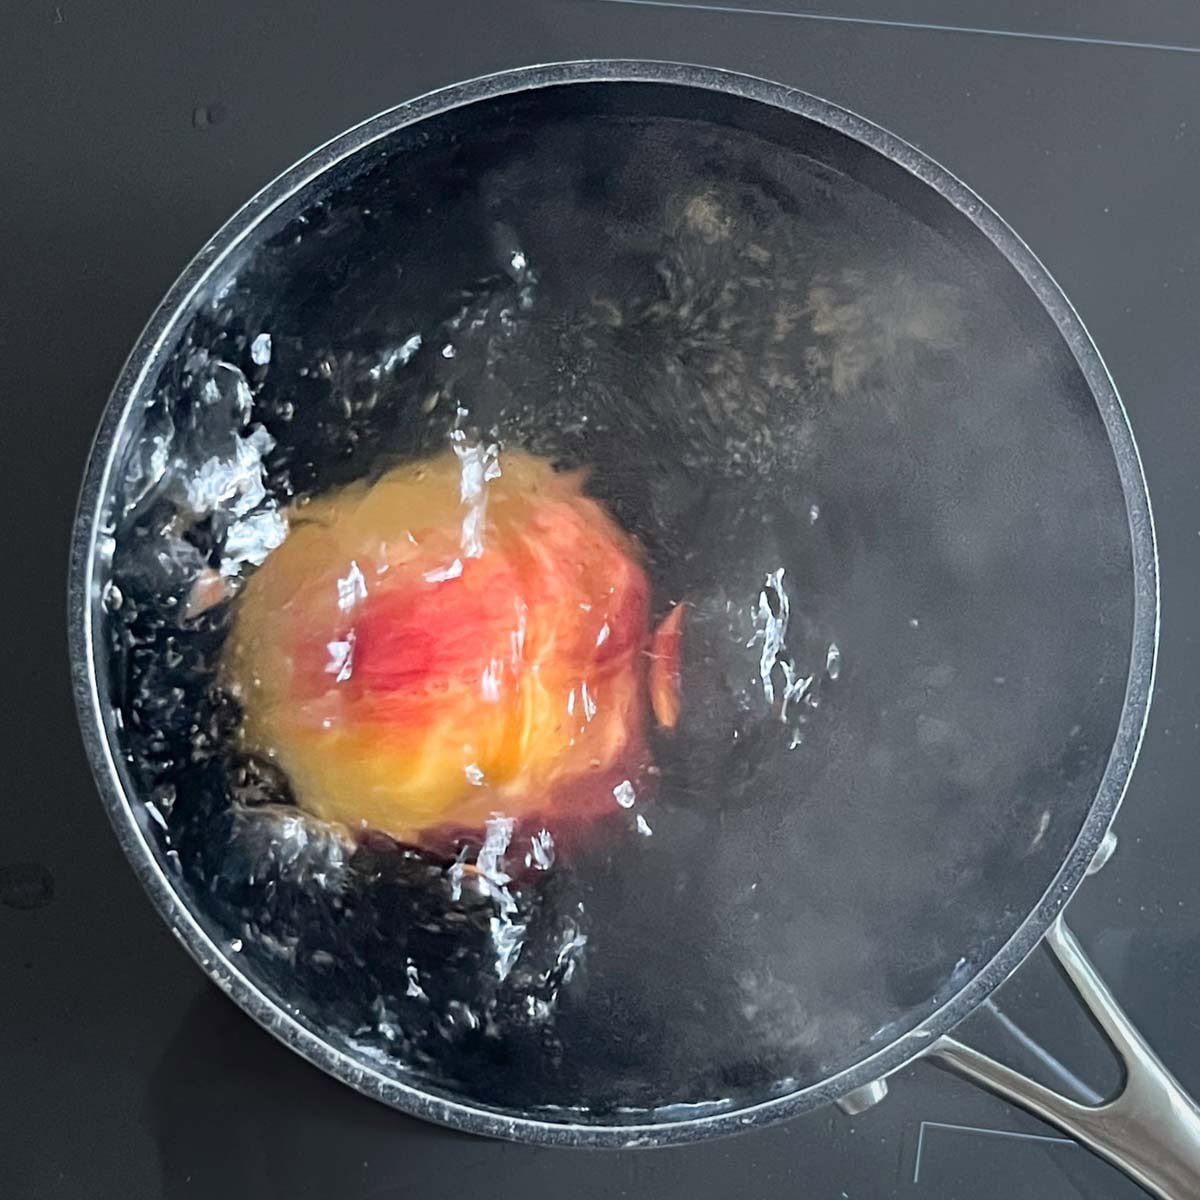
Step 2: Blanch.
Bring a large pot of water to a boil. Carefully lower the peach into the boiling water, letting it cook for 45–60 seconds. Keep an eye out – you’ll see the skin near the ‘X’ begin to curl and pull away from the flesh.
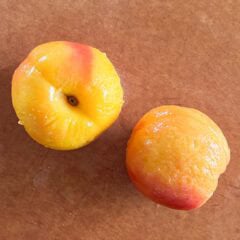
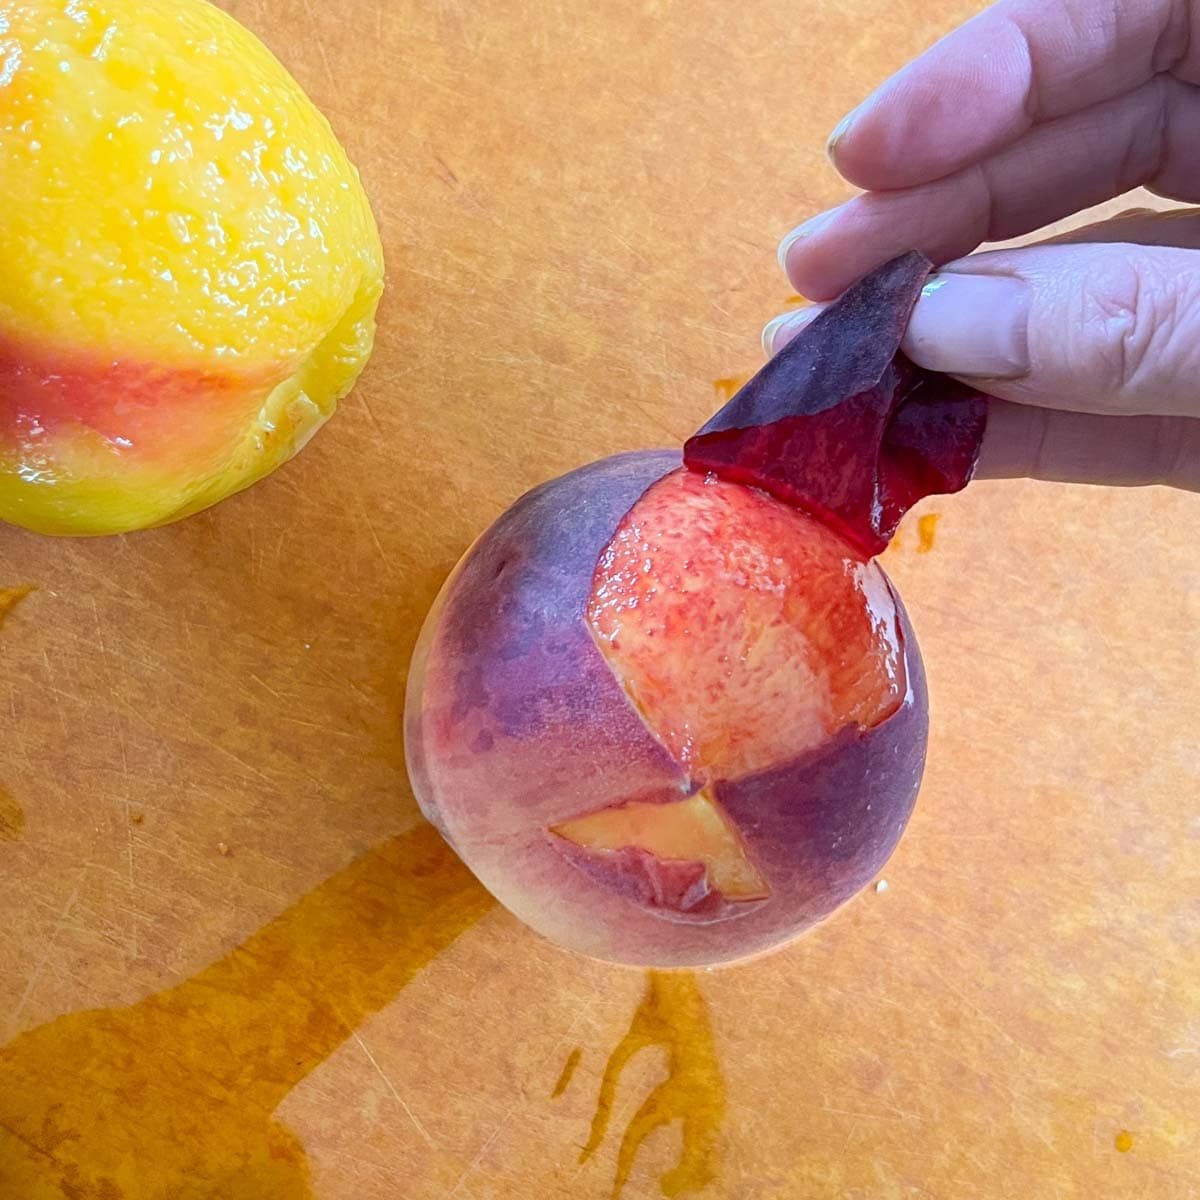
Step 3: Cool & peel.
Carefully lift the peach from the water with a slotted spoon and transfer it to a cutting board. Let the peach cool just until it’s comfortable to handle. Once cool, gently pinch the loosened skin at the ‘X’ and peel it back – it should slip off effortlessly in smooth, wide strips.
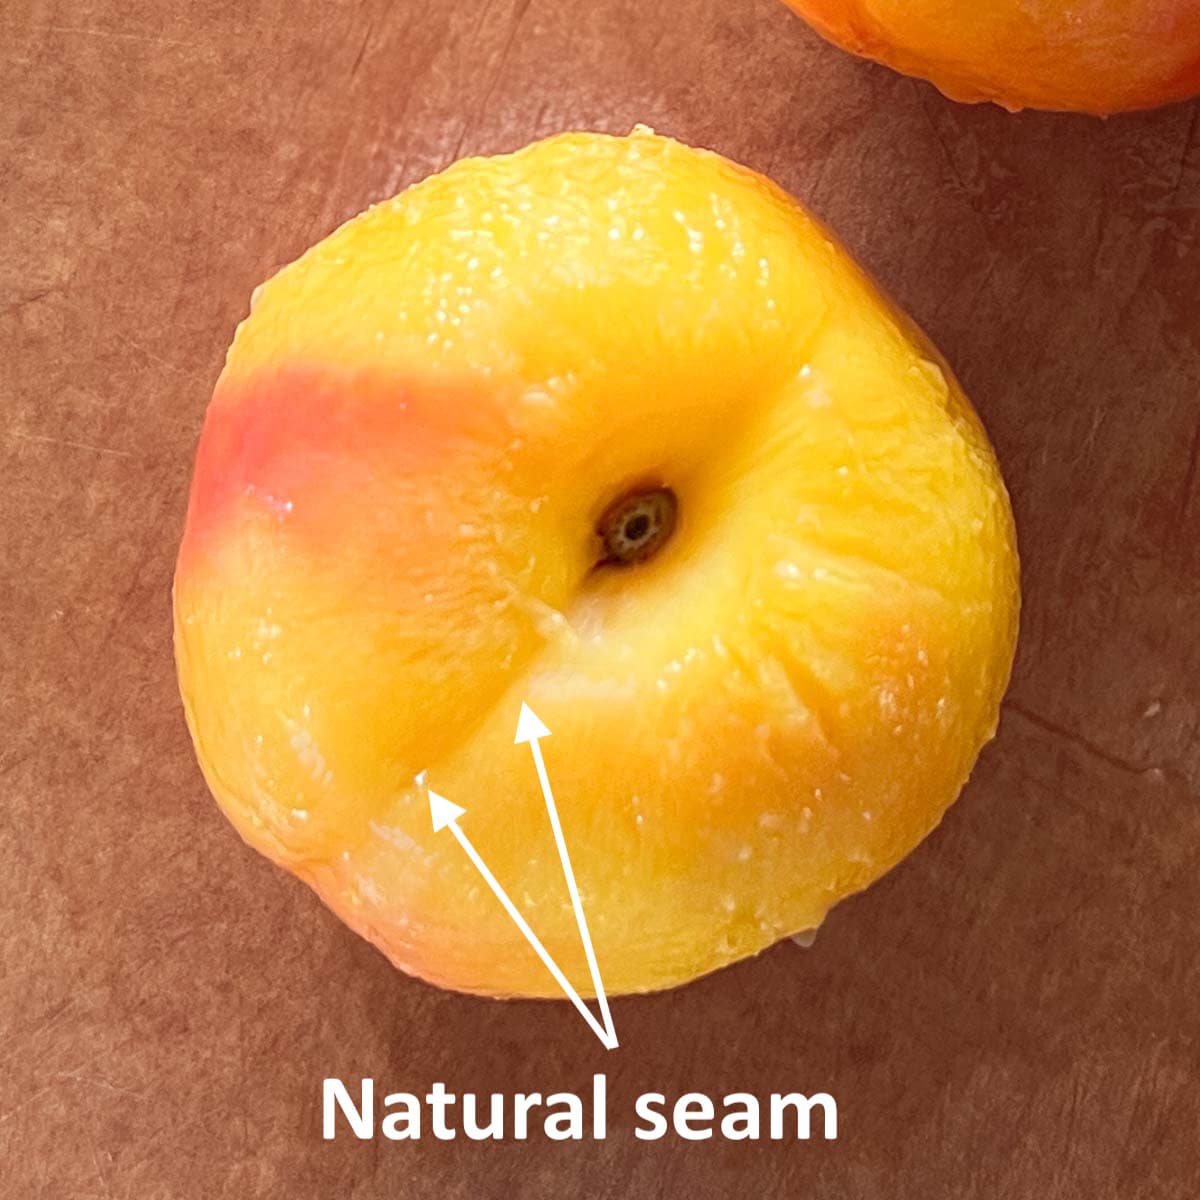
Step 4: Identify the seam.
Find the peach’s natural seam – a subtle crease running from stem to base where the fruit curves inward slightly. This is Mother Nature’s guide, showing you exactly where the peach is ready to split apart with ease.
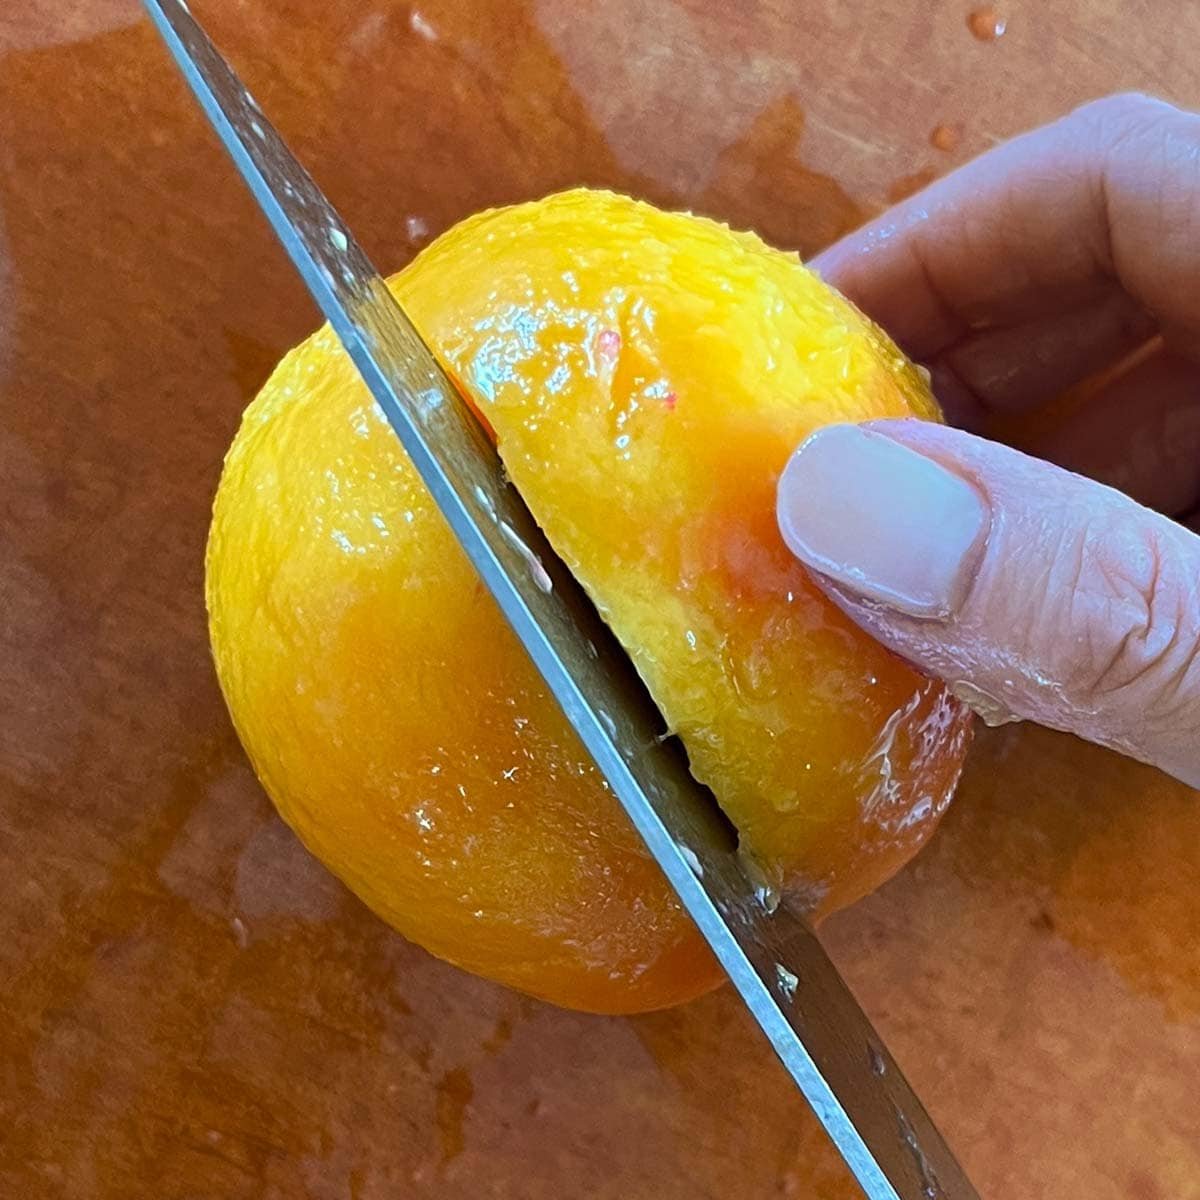
Step 5: Halve and pit.
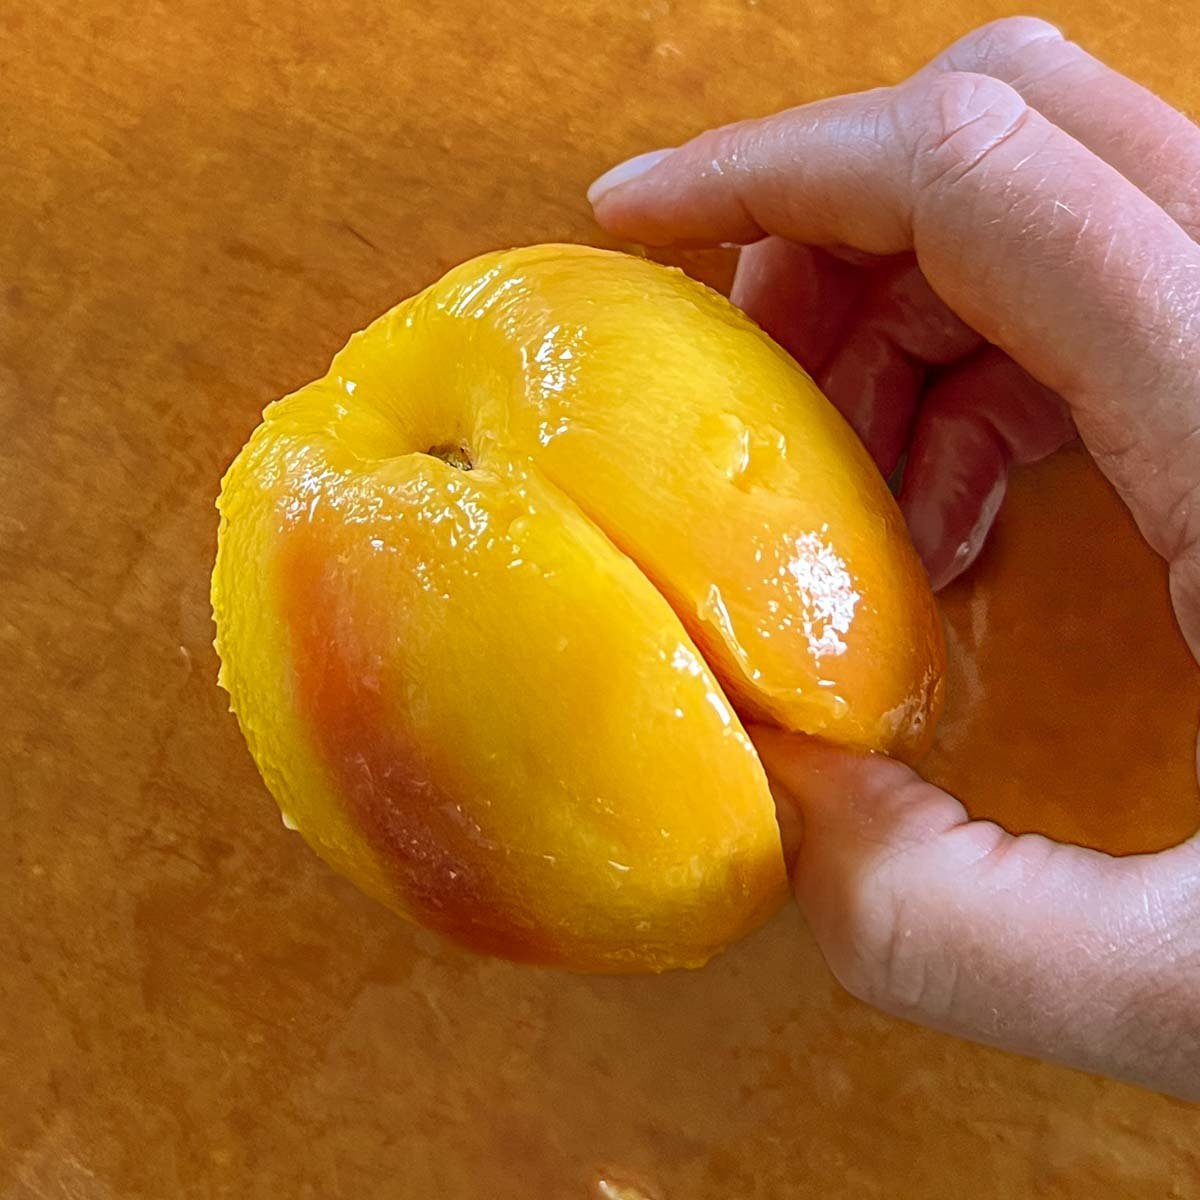
With a sharp knife, follow the natural seam in one smooth motion, cutting cleanly around the entire peach. Cradle each peach half in your palms and twist gently in opposite directions to separate.
The two halves should separate easily. If needed, wedge your thumb into the seam to coax stubborn halves apart. Discard the pit, and your perfectly halved peach is now ready for you to use in your recipes!
It’s normal for the pit to remain stuck to the flesh when using clingstone peaches. If that happens, make further cuts around the stone in slices, cutting away from the pit. You can then gently remove the flesh, one slice at a time, until the stone is free.
Tips for Success
- Best type of peach. Use freestone peaches that are slightly under-ripe to ripe (avoid overripe ones). They tend to peel and halve the easiest using the method outlined above. Overripe peaches are too soft. I buy my peaches hard, then let them ripen on the kitchen counter until fragrant and soft to the touch. I find this approach results in sweet peaches that are full of flavor and not bruised.
- Extra blanching time. If the skin resists peeling, simply return the peach to boiling water for 15-30 more seconds – this extra time helps loosen the skin without overcooking the fruit.
- Blanch in batches. Use a large pot to blanch up to 6-8 whole peaches at a time. Most recipes require 4 or more peaches. You can always blanch more and store your peeled peaches in the fridge for later use.
- Place in an ice bath (optional). Transfer the peaches to an ice bath with cold water immediately after blanching. Leave them submerged until completely cool to the touch, about 1-2 minutes. This step, called ‘shocking’, halts the cooking process by rapidly cooling the peaches in ice water and is recommended if you intend to use your peaches in fresh dishes, like salads, or if your peaches are very ripe.
Frequently Asked Questions
Look for vibrant red and yellow skin (avoid green tones), smell the peaches for a sweet, fragrant aroma, and gently squeeze them to test for slight give without mushiness. Avoid peaches with bruises, brown spots, or wrinkled skin, as these are signs of over-ripeness or damage. A ripe peach should feel softly firm (not rock-hard or squishy) and smell peachy.
Not always! Peeling a peach is great for recipes where you don’t want the skin as added texture, or if you generally don’t enjoy the texture of peach skin. That said, I’ve left peach skin on for other dishes where it adds a lovely addition to the overall flavor and texture of the recipe, such as Grilled Peach Salad and Butterscotch Pudding Filled Peaches.
I’ve found blanching peaches in boiling water to be the best and easiest way to peel a peach. I know that some online guides show you how to peel a peach using the microwave but the risk is uneven heating which means that you may still need to use a vegetable peeler.
Always buy and use peaches during peach season, which will differ depending on your location. It’s the best way to get that sweet summertime peach flavor. Look out for specials at your local grocery store or try to purchase your juicy peaches from farmer’s markets.
Favorite Peach Recipes
Once peeled and pitted, your peaches are ready for your favorite recipes. Here are a few delicious ways to use them:
- No Yeast Cinnamon Rolls with Peach Filling
- Peach Muffins
- Peach Blueberry Pie
- Peach Ice Cream
- Individual Peach Upside-Down Spice Cakes
- Roasted Peaches, Plums and Nectarines with Candied Walnuts
- Peach Sauce
- Tomato Peach Salad

How To Peel A Peach
Ingredients
- 6 Peaches, ripened
- Water, boiling
- Ice, optional
Instructions
- Take a sharp paring knife and lightly score a small ‘X’ into the bottom of each peach (the side opposite the stem). This tiny cut helps the skin slip off easily during the next step.
- Bring a large pot of water to a boil. Carefully lower the peach into the boiling, letting it blanch for 45–60 seconds. Keep an eye out – you’ll see the skin near the ‘X’ begin to curl and pull away from the flesh.
- Carefully lift the peach from the water with a slotted spoon and transfer it to a cutting board. Let the peach cool just until it’s comfortable to handle. Once cool, gently pinch the loosened skin at the ‘X’ and peel it back – it should slip off effortlessly in smooth, wide strips.
- Find the peach’s natural seam – a subtle crease running from stem to base where the fruit curves inward slightly. This is Mother Nature’s guide, showing you exactly where the peach is ready to split apart with ease.
- With a sharp chef’s knife, follow the natural seam in one smooth motion, cutting cleanly around the entire peach. Cradle each half in your palms and twist gently in opposite directions.
- The two halves should separate easily. If needed, wedge your thumb into the seam to coax the halves apart. Discard the pit, and your perfectly halved peach is now ready for you to use in your recipes!
Notes
- You’ll need a large pot, a cutting board, and a sharp kitchen knife to peel and pit your peaches.
- An ice bath is an optional step if you want to stop further cooking of the peaches once they’ve been blanched. This is recommended if using the peaches cold, as in a salad.
Nutrition
Nutrition information is automatically calculated, so should only be used as an approximation.