Olive Cheese Balls are a delicious, impressive and crowd-pleasing appetizer. Tangy pimiento-stuffed green olives are baked in a cheesy, flaky crust and served hot. The best part? These little bites of heaven can be prepared up to 1 month ahead, frozen and then heated just before serving. Detailed instructions on how to prepare, freeze, and heat are all included, to ensure they come out perfect every time!

Note: This post contains referral links for products I recommend. As an Amazon Associate, I earn a small commission on qualified purchases, at no cost to you.
Table of Contents
Impressive Make Ahead Olive Appetizer
Olive Cheese Balls, also referred to as Baked Cheese Olives, or Hot Cheese Olives, is a classic appetizer recipe dating back to the 1950s – which means it’s been around for close to 70 years! They’re that good. Plus, they go perfectly with another icon of the ’50s – martinis, Robert’s and my favorite cocktail.
Versions of this recipe have been given to me over the years, dating back to the early 1980s when I was living in Minneapolis, and one of my roommates made them for a cocktail party we were hosting. I had forgotten about them, until a few years ago when my cousin Beth Kidwell gave me a slightly different version. The basic ingredients are the same; it’s the method that’s different. And the Olive Cheese Balls recipe I’m sharing today is my adaptation of those two versions.
How to Make Olive Cheese Balls
Crispy, briny, slightly nutty tasting, pimiento-stuffed green olives are nestled in a scrumptious crust of butter and Cheddar cheese spiked with paprika and cayenne pepper. After baking, these little bites of deliciousness are flaky and cheesy on the outside, juicy and tangy on the inside. Yum!!
Here are the steps to follow in assembling and baking these delectable little bites:
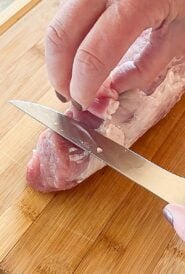
- Dry olives.
Drain liquid from olives and place on paper towel to dry. Make sure they are very dry before wrapping with the pastry. - Combine dry ingredients for dough.
In a small mixing bowl, whisk together 1/2 cup flour, paprika, salt and cayenne. Set aside. - Combine butter and cheese.
Using an electric mixer with the paddle attachment, beat the butter until creamy. Beat in the cheese until well blended. - Add flour mixture; refrigerate dough.
Blend in the flour mixture just until combined. Mix in additional flour as needed. The dough should be crumbly and fairly dry, but hold together when pinched. (If it’s too wet, it will spread when baked.) Refrigerate dough for 30 minutes. - Enclose olives in dough.
Pinch off a piece of dough around the size of a walnut half; flatten into a thin, oval shape and wrap around an olive, enclosing it completely. Make sure the dough is tight around the olive. Place on a cookie sheet. Repeat with the remaining dough and olives. - Chill olives.
Refrigerate olives until very cold – at least 1 hour, up to overnight. - Prep oven and baking dish.
Preheat oven to 400 degrees. Line a rimmed cookie sheet with parchment paper. - Bake olives.
Place refrigerated (cold) cheese olives on prepared cookie sheet. Bake for 15 to 18 minutes or until dough is set and they are lightly browned. - Cool and serve.
Cool baked olives for a few minutes, then serve.

Tips on Preparing Cheese Olive Balls
These Cheese Olives are easy to prepare, but you do need to pay attention to my directions and ingredient quantities. Here are my tips that ensure they’ll come out perfect, every time:
- Place the olives on paper towel to dry before wrapping. This is a must! Otherwise, the briny liquid makes the pastry dough too wet.
- Use an electric mixer. It’s important to make sure that the ingredients are blended together well. Otherwise, the dough can be dry and crumbly, making it difficult to wrap the olives. I’ve never done it, but you could probably use a food processor as well.
- Don’t add all the flour at once. Too much flour will also make the dough dry; not enough and the dough will be wet and spread when baked. The amount of flour needed depends on the quantity of water in your butter, as well as the humidity levels where you live – and on the day you’re cooking. So, add 1/2 cup flour to start, then add more if the dough is too wet.
- Refrigerate the pastry-wrapped olives before baking. Having made these balls several times, I find they come out best if prepared and then refrigerated for at least 1 hour before baking. If the dough is too warm, it can spread and they don’t keep a nice rounded shape.

The traditional recipes for Cheese Olive Balls call for Manzanilla, or small green pimiento-stuffed olives, usually from Spain. I think their briny, nutty and a bit smoky flavor pairs perfectly with the Cheddar cheese in the crust.
With the Manzanilla olives, Cheddar cheese is the perfect flavor match. And, it’s semi-soft texture means it will melt easily. Use a good quality, sharp Cheddar for the most flavor.
How to Serve this Olive Ball Recipe
I like to place the baked olives on a serving platter and pass them to my guests. Make sure they have a napkin as sometimes the cheese in the dough can make them a tad greasy.
How to Store Baked Cheese Balls
If making ahead, prepare the olives but don’t bake. Place on an unlined cookie sheet in a single layer and freeze. Once frozen, move to a ziptop baggie and place back in the freezer. They will keep for around 1 month.
Other cheesy, one or two-bite appetizers you might like
Did you make this recipe?
If you make this recipe, be sure to comment and give it a rating below. Don’t hesitate to ask questions – I’m happy to help!

Olive Cheese Balls
Ingredients
- 7 ounces Manzanilla pimiento-stuffed green olives, around 3 dozen small
- 1/2 to 3/4 cup all-purpose flour, or more as needed
- 1/2 teaspoon paprika
- 1/4 teaspoon table salt
- 1/8 teaspoon cayenne pepper
- 1/4 cup salted butter, softened
- 1/4 pound grated sharp Cheddar cheese, around 1 cup packed
Instructions
- Drain liquid from olives and place on paper towel to dry. Make sure they are very dry before wrapping with the pastry.
- In a small mixing bowl, whisk together 1/2 cup flour, paprika, salt and cayenne. Set aside.
- Using an electric mixer with the paddle attachment, beat the butter until creamy. Beat in the cheese until well blended.
- Blend in the flour mixture just until combined. Mix in additional flour as needed. The dough should be crumbly and fairly dry, but hold together when pinched. (If it’s too wet, it will spread when baked.)
- Refrigerate dough for 30 minutes.
- Pinch off a piece of dough around the size of a walnut half; flatten into a thin, oval shape and wrap around an olive, enclosing it completely. Make sure the dough is tight around the olive.
- Place on a cookie sheet. Repeat with the remaining dough and olives. Refrigerate olives until very cold – at least 1 hour, up to overnight.
- Preheat oven to 400 degrees. Line a rimmed cookie sheet with parchment paper.
- Place refrigerated (cold) cheese olives on prepared cookie sheet. Bake for 15 to 18 minutes or until dough is set and they are lightly browned. Cool for a few minutes, then serve.
Notes
Table of Contents
Nutrition
Nutrition information is automatically calculated, so should only be used as an approximation.


So excited to come across your recipe! It was a childhood favorite and I didn’t want to dig it out! Only difference is we used black olives and stuffed it with a green onion snipped off at the end. I’m going to try it with both types and see which the family prefers- I know I will love both!
Thanks, Lisa! Your family’s version sounds delicious – I’m going to try that.
I wonder if there is a way to use crushed to almost a powder Cheese-It crackers as the dough instead of cheese and flour?
That’s such a fun idea – I love where you’re going with that!
You could experiment with finely crushed Cheese-Its, but they won’t bind as well as the cheese + flour dough, so the mixture would likely be too crumbly to wrap around the olives and hold its shape.
A better option might be to mix some crushed Cheese-Its into the dough in place of a bit of the flour for extra flavor.
If you give it a try, I’d love to hear how it turns out!
love these! My grandmother used to make them. I like to mix the butter/cheese with a fork, then knead the flour mixture in by hand as if making bread. Always make a double batch. Thank you for the recipe.
You’re welcome! And thank you for the mixing/kneading technique. I’m going to try that.
Love this recipe—it was one of my mom’s favorites! Can you double this recipe? Any adjustments needed?
While I’ve never done it, I don’t see why you can’t double this recipe. After refrigerating the dough for 30 minutes, I would take half out, roll half of the olives, then do the other half. That way, the dough won’t get too soft.
When I was younger, in my teens, my mother made these and they are delicious. A lot of her recipes were lost in a flood and I have been looking for many recipes my mother had lost. These are one of my favorite snack foods. Thank you for bringing my mother back to me
What a beautiful memory – thank you for sharing it with me. I truly believe recipes carry stories and love with them, and I’m so glad this one brought your mother back to you.
My Mother-in-Law used to hold an Open House every New Year’s Day, back in the late 1960s. The ‘kids’ were recruited to be servers of food and drinks. I can remember serving these cheese olive balls back then and they were always a success.
What a fun story! Thanks for sharing.
How much cayenne for this recipe??
For 4 to 5 shakes of cayenne pepper (as called for in the recipe), I would start with 1/8 teaspoon.
Sounds wonderful!
Do you think it would work if you used either/or both blue cheese stuffed olives and /or blue cheese in the batter cover?
Thanks
Carole
I’d try it with blue-cheese stuffed olives, but wouldn’t add blue cheese to the batter – it might affect how well the batter holds together when baked. Let me know how they turn out!