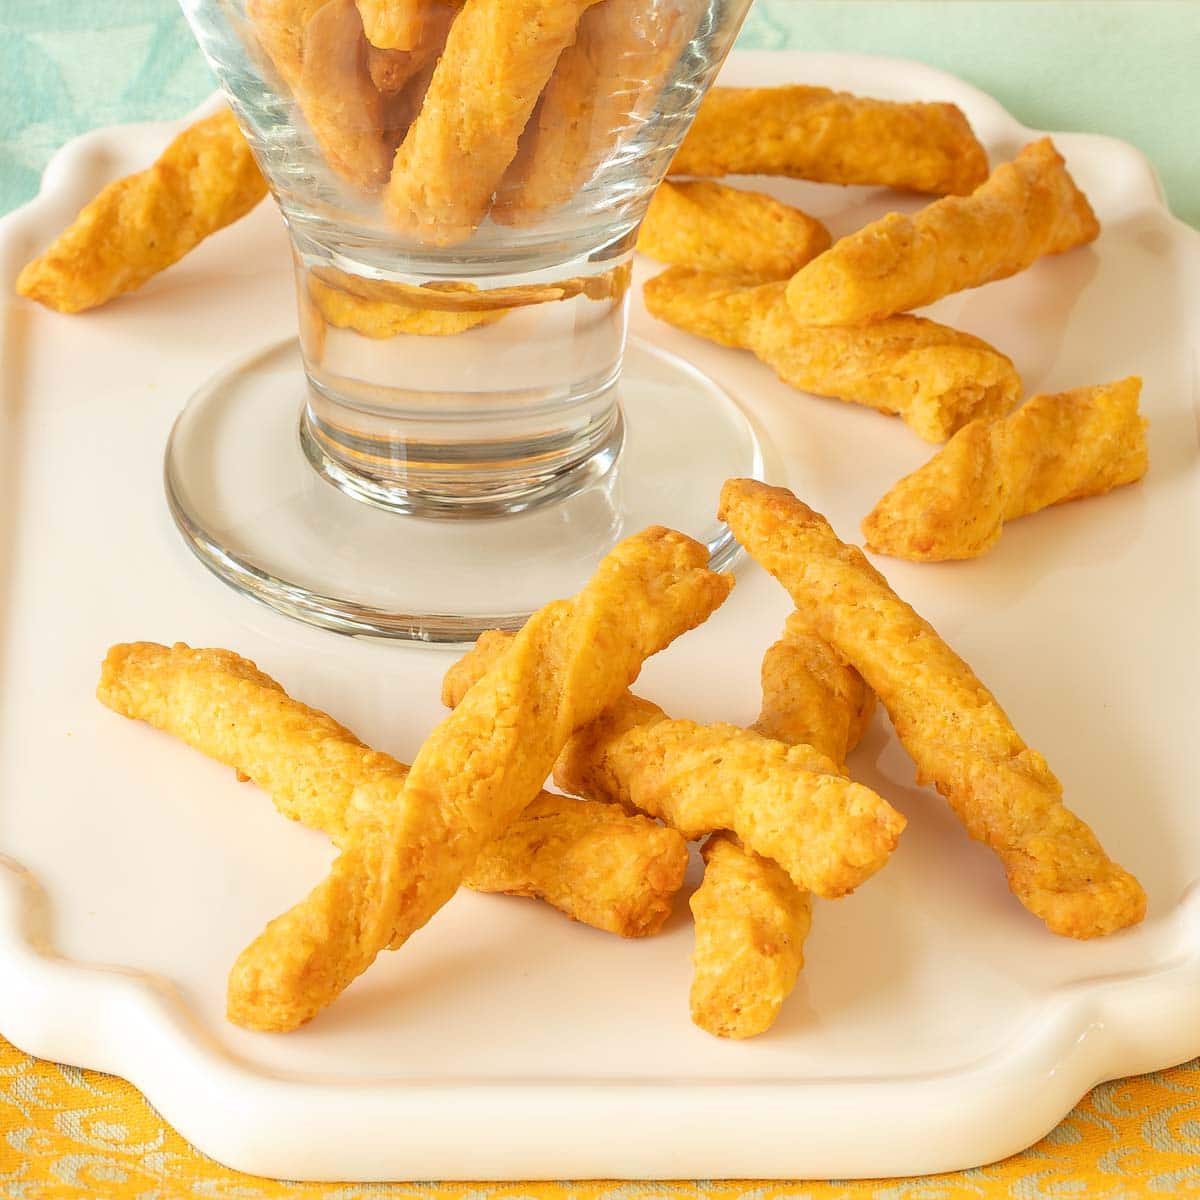
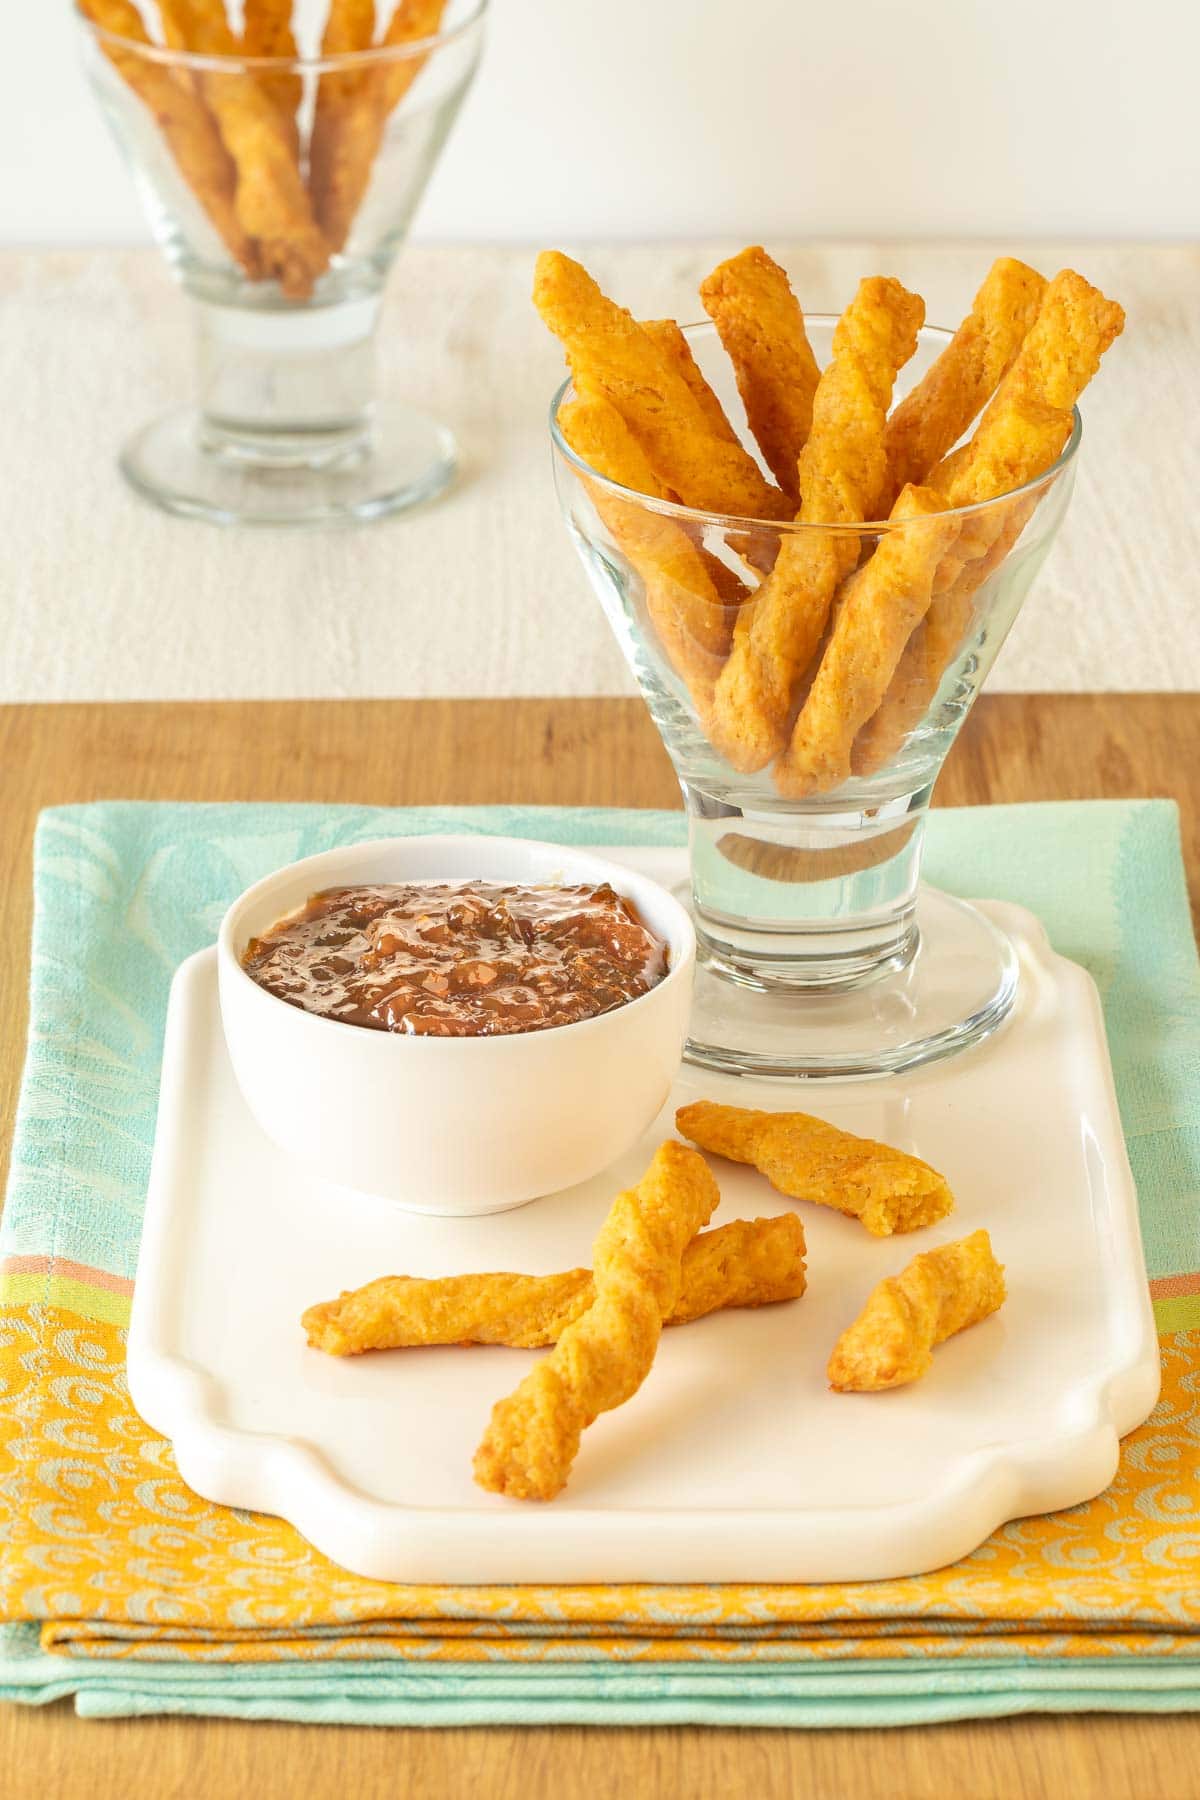
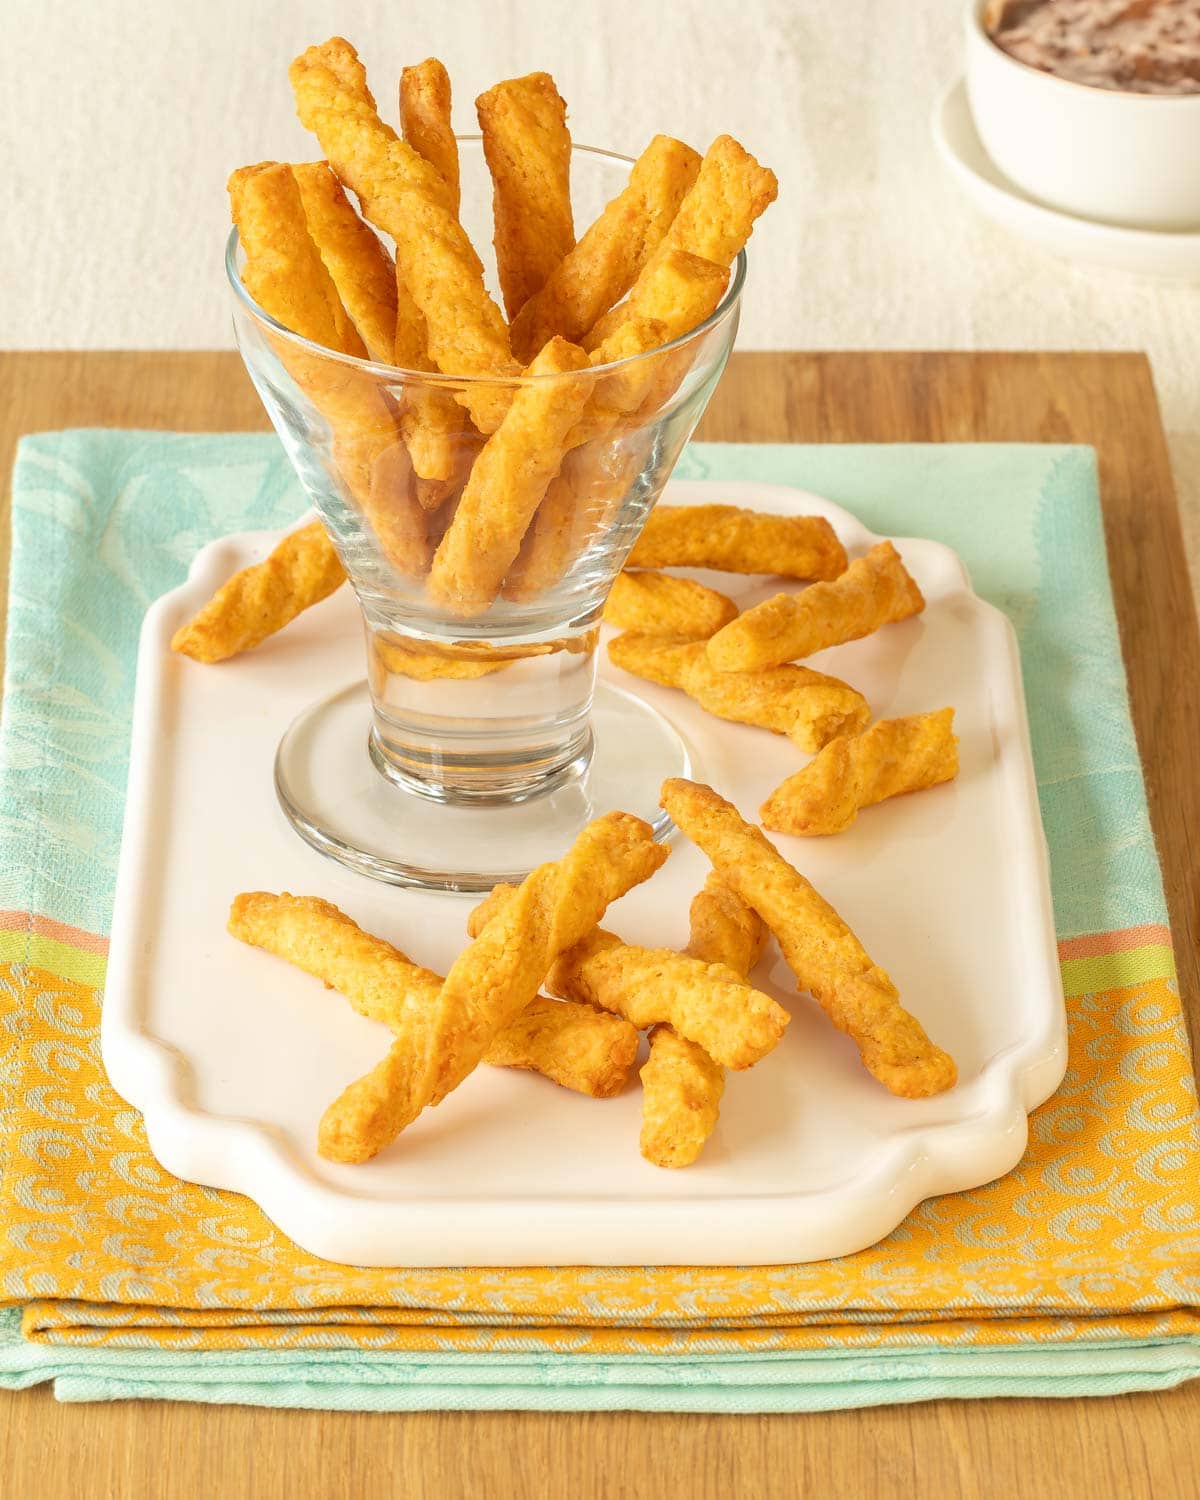
Are you a fan of cheesy appetizers that are both savory and crispy? If so, then you’re going to love these irresistible Crispy Cheese Straws. These savory treats combine the rich flavors of Cheddar cheese, chili powder, and cumin with a delicate, flaky dough, resulting in a crispy mouthwatering delight that is both elegant and alluring in its simplicity. For a unique twist, serve spicy pepper jelly (or jam) alongside as a dipping sauce!

This post contains referral links for products I recommend. As an Amazon Associate, I earn a small commission on qualified purchases, at no cost to you.
Table of Contents
- Why This Recipe for Cheese Straws Works
- History and Origin of Cheese Straws
- Ingredients
- Variations and Creative Twists on Cheese Straws
- Step-by-Step Guide on How to Make Cheese Straws
- Tips for Perfecting Your Cheese Straw Recipe
- Serving and Pairing Suggestions for Cheese Straws
- Storing Cheese Straws
- Other Cheesy Appetizer Recipes to Try
- Crispy Cheddar Cheese Straws – Easy Recipe!
Why This Recipe for Cheese Straws Works
As a lover of numerous cheese recipes, these little bites have become one of my favorite appetizers! After several rounds of testing, modifying, and re-testing, I’ve arrived at what I think is the recipe for a perfect party appetizer. Here’s a few reasons why:
- Popular and recognizable. Whether you’re hosting a casual get-together or a formal event, these cheddar cheese straws make for a perfect party snack. They’re a recognizable and popular appetizer, ensuring they’ll be a guaranteed hit at your party!
- Unique version with a pop of spice. In addition to Cheddar cheese, I include chili powder and cumin, to infuse exciting flavors into this classic recipe. The subtle heat from the chili powder and the warm, earthy notes of cumin add a unique twist to these cheese straws.
- Trimmed for dipping. I cut my straws so they’re only 3 inches long, making them more approachable and easier to eat. And, I add a spicy pepper jelly or jam as a dipping sauce!
- Easy to prepare. These crispy cheddar cheese bites are a perfect choice for those seeking easy recipes. With minimal effort (and my step-by-step instructions!), it’s a breeze to create this impressive and fun appetizer.
- Make ahead. These delicious bites can be prepared up to 1 week ahead, placed in an airtight container, and refrigerated. They can also be held for up to 24 hours at room temperature (any longer and they can become less crispy). Moreover, the dough can also be prepared, placed in a freezer-safe baggie, and frozen for up to 1 month.
History and Origin of Cheese Straws
Cheese straws have a long and rich history that can be traced back to the southern United States. So, it’s not surprising I love them since my family is from the South! The origins of this crowd-pleasing snack date back to the early 1800s. Often made with leftover pie dough, they were originally flavored with various types of cheese and spices. Over time, the recipe has evolved, and cheese straws have become a beloved snack that is served at parties, holidays, and special occasions not just in the South, but in various forms throughout the US and around the world.
Ingredients
To make my recipe for cheese straws, you’ll need just a handful of readily available ingredients:
- Cheese – I recommend following the traditional approach and using sharp Cheddar cheese, due to its bold flavor and easy melting. As an alternative, Gruyere or Parmesan cheese would also work well. I recommend not purchasing pre-shredded cheese; the ingredient added to keep it from clumping can interfere with melting.
- Flour – All-purpose unbleached flour works best for achieving the right texture and structure.
- Butter – Use salted butter to maximize the flavor, and make sure its cubed and cold when you start making the dough. If you prefer unsalted butter, then add a pinch more salt.
- Egg yolks – Using egg yolks, not whole eggs, in Cheddar cheese straw dough enhances the rich, cheesy flavor, adds a desirable golden color, and provides necessary binding properties without introducing excess moisture or contributing to a chewier texture.
- Spices and seasonings – Chili powder and cumin, to add a subtle kick of heat and flavor. You could also use cayenne pepper, paprika, or garlic powder.
- Kosher salt – A bit of salt enhances the overall flavor of the straws.
Optional add-ins: Get creative and experiment with additional ingredients like herbs, nuts, or even dried fruits to create unique flavor combinations. Cilantro would work well with the chili powder and cumin.
Variations and Creative Twists on Cheese Straws
While traditional cheese straws are delicious on their own, adding a creative twist to the ingredients can take them to a whole new level. Here are a few ideas to inspire your culinary creativity:
- Spicy Jalapeno Cheese Straws. Add finely chopped jalapeno or serrano peppers to the dough for more of a fiery kick.
- Herb and Garlic Cheese Straws. Instead of chili powder and cumin, incorporate dried herbs like rosemary, thyme, or oregano, along with minced garlic, into the dough for a fragrant and savory twist.
- Bacon and Cheddar Cheese Straws. Crumble cooked bacon and mix it with grated cheddar cheese for a hint of smokiness.
Alternatively, create cheese wafers instead of straws: Roll the dough into a log around 1 to 1 1/4 inch thick, wrap and chill for at least 1 hour or until well chilled. Slice dough log into 1/4-inch thick rounds and place 1/2-inch apart on prepared sheet pan. Bake for 20 minutes or until lightly brown on the edges. Let cool completely on pan.
Step-by-Step Guide on How to Make Cheese Straws

- Mix dry ingredients with cheese.
Place cheese, flour, chili powder, cumin, and salt in the large bowl of a food processor. Using the metal blade, mix the ingredients together. Blend until well mixed and the cheese is finely chopped. - Add butter then eggs.
Add butter and process until the cheese mixture looks like wet sand. Add egg yolks and water; process until dough starts to hold together. Watch the dough carefully and stop the machine as soon as the dough starts to clump together; it will look rough. - Check dough consistency; adjust as needed.
Pinch a piece of dough together with your thumb and index finger; if the dough holds together, it’s ready. If it isn’t clumping or looks too dry and crumbly, sprinkle in a small amount of water and pulse 1 to 2 more times. - Form dough into ball; refrigerate.
Remove the dough from the machine and place on a clean work surface. Using your hands, form into a tight ball, then press into a rectangle. Wrap and chill for at least 1 hour or until well chilled. - Prep oven and baking pans.
Preheat oven to 350 degrees F. Line 3 half-sheet pans (or other large rimmed cookie sheets) with parchment paper. - Soften dough.
Remove dough from refrigerator and let sit at room temperature for 15 to 20 minutes or until soft enough to roll. - Roll dough and cut into straws.
Roll dough into a 1/4-inch thick rectangle. Cut into 1/2-inch wide strips. Cut strips into pieces 3 to 3 1/2 inches long. Twist pieces 2 to 3 times and place 1/2 inch apart on prepared sheet pans. Push down to flatten ends (this will keep the straws from unraveling). - Bake; cool.
Bake for 15 to 20 minutes or until golden brown on the edges. If not baking in a convection oven, rotate the pans after 8 minutes. Remove from oven and let straws cool completely on the pan.
Tips for Perfecting Your Cheese Straw Recipe
Creating the perfect cheese straws requires attention to detail and a few helpful tips. Here are some pointers to ensure your cheese straws turn out irresistibly delicious:
- Grating the cheese. Grate the cheese while it’s still cold for easier handling and a better texture. Using purchased pre-shredded cheese is not recommended because it’s likely to contain anti-caking additives that will negatively impact the meltability of the cheese, In addition, it’s also dryer than freshly grated cheese, which can negatively impact the texture and flavor.
- Butter temperature. Make sure the butter is cold and cubed before incorporating it into the mixture. Cold butter helps create a flaky and tender texture.
- Proper dough consistency. Pinch a piece of dough together with your thumb and index finger; if the dough holds together, it’s ready. If it isn’t clumping or looks too dry and crumbly, sprinkle in a small amount of water and pulse 1 to 2 more times. On the other hand, if it’s too wet, add a sprinkle of flour. Also, don’t overprocess or your straws can become tough or chewy.
- Rolling out the dough. Roll the dough to an even thickness and cut the straws all as close to the same size as possible, to ensure consistent baking. I like to use this roller.
- Baking time. Keep a close eye on the cheese straws while they’re baking to prevent over-browning. Because ovens vary, start checking on the straws 5 minutes prior to the baking time in the recipe, and adjust if needed.
- Cooling and storing. Allow the cheese straws to cool completely before storing them in an airtight container. This will help maintain their crispness and flavor.
Serving and Pairing Suggestions for Cheese Straws
Cheese straws are incredibly versatile and can be enjoyed in various ways. Here are a few serving and pairing suggestions to enhance your cheese straw experience:
- Cheese straws with a dipping sauce. Serve a spicy pepper jelly alongside the straws for dipping. I like to use one that’s both sweet and savory, with a bit of a kick – for example, jalapeno peach or plum jam.
- Cheese and charcuterie board. Pair your cheese straws with an assortment of cheeses, cured meats, olives, and dried fruits.
- Soup or salad accompaniment. Serve cheese straws alongside a bowl of warm soup or a fresh tossed salad for a delightful crunch and added flavor.
For a complete menu including these cheese straws, check out my Elegant Summer Picnic Menu.
Storing Cheese Straws
To keep your Cheese Straws fresh and crispy, follow these storage tips:
- Airtight container. Store your cooled cheese straws in an airtight container to prevent moisture from softening them.
- Refrigeration. Refrigerate your cheese straws to maintain their crispness. Dough can be prepared but not cut and refrigerated for up to 4 days. In either case, place in a ziptop baggie or airtight container.
- Freezing. Cheese straw dough can be placed in a freezer-safe baggie and frozen for up to one month. Thaw overnight in the refrigerator.
Other Cheesy Appetizer Recipes to Try
- Mini Cheese Tart Appetizers
- Pimiento Cheese Appetizers with Green Chiles
- Mini Cheese Balls Two Ways
- Sautéed Brie with Green Onion
- Pimiento Cheese Spread
- Feta Cheese Spread
- Baked Olive Cheese Balls
- Kentucky Cheese Torte
- Prosciutto Appetizers with Mozzarella and Basil
- Onion Parmesan Toasts
- Green Chile Canapés
Still looking for more appetizer ideas? Check out these 30 Super Bowl Appetizer Recipes that can be served year round!
Did you make this recipe?
If you make this recipe, be sure to comment and give it a rating below. Don’t hesitate to ask questions – I’m happy to help!

Crispy Cheddar Cheese Straws – Easy Recipe!
Equipment
- 1 Food processor with metal blade
Ingredients
- 8 ounces Shredded Sharp Cheddar cheese, around 2 cups
- 1 1/2 cups all-purpose flour
- 1/2 teaspoon chili powder
- 1/2 teaspoon ground cumin
- 1/2 teaspoon kosher salt
- 8 tablespoons cold butter, cut into 1/4-inch cubes
- 2 large egg yolks
- 2 tablespoons water
- Jalapeno or other pepper jelly, for serving
Instructions
- Place cheese, flour, chili powder, cumin, and salt in the large bowl of a food processor. Using the metal blade, mix the ingredients together. Blend until well mixed and the cheese is finely chopped.
- Add butter and process until the cheese mixture looks like wet sand. Add egg yolks and water; process until dough starts to hold together. Watch the dough carefully and stop the machine as soon as the dough starts to clump together; it will look rough.
- Pinch a piece of dough together with your thumb and index finger; if the dough holds together, it’s ready. If it isn’t clumping or looks too dry and crumbly, sprinkle in a small amount of water and pulse 1 to 2 more times.
- Remove the dough from the machine and place on a clean work surface. Using your hands, form into a tight ball, then press into a rectangle. Wrap and chill for at least 1 hour or until well chilled.
- Preheat oven to 350 degrees f. Line 3 half-sheet pans (or other large rimmed cookie sheets) with parchment paper.
- Remove dough from refrigerator and let sit at room temperature for 15 to 20 minutes or until soft enough to roll.
- Roll dough into a 1/4-inch thick rectangle. Cut into 1/2-inch wide strips. Cut strips into pieces 3 to 3 1/2 inches long. Twist pieces 2 to 3 times and place 1/2 inch apart on prepared sheet pans. Push down to flatten ends (this will keep the straws from unraveling).
- Bake for 15 to 20 minutes or until golden brown on the edges. If not baking in a convection oven, rotate the pans after 8 minutes.
- Remove from oven and let straws cool completely on the pan.
- Serve with pepper jelly as a dipping sauce.
Notes
Nutrition
Nutrition information is automatically calculated, so should only be used as an approximation.


Disregard and delete that comment. My apologies….for some reason, 4 oz was showing up. I’m sorry.
No worries! I deleted it.
I made these in the 80s made up my own recipe, everyone loved them. Never made them from other spices for variety. Can’t wait to try these. Also never thought of cheese straws ?
Looks delicious and I plan on making them, but the format for printing the recipe really needs to be changed. There is no reason this should take 4 sheets of paper. Now I have to spend time, after saving it as a PDF, to edit it down to one page.
Marcelle – I’m so sorry you had an issue with the print function. I’m looking into this now and will get it fixed ASAP. Thanks for bringing it to my attention.