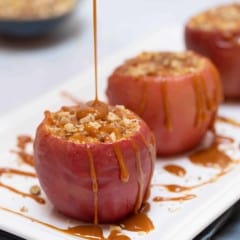
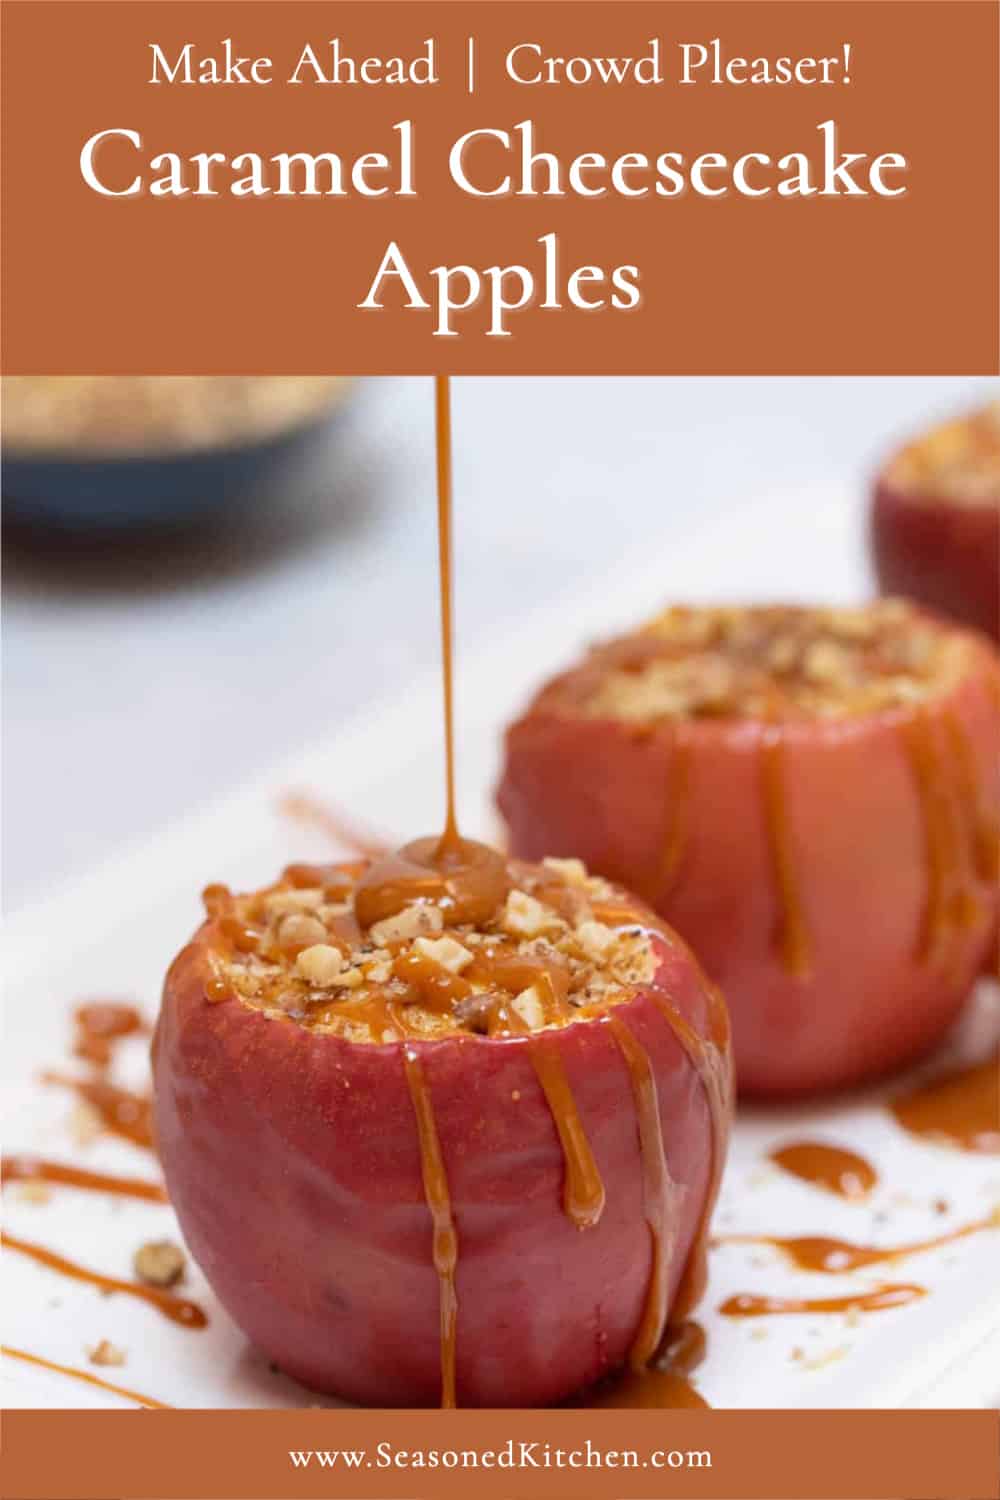
Stuffed Cheesecake Apples take caramel apples to the next level of deliciousness by filling the apples with cheesecake cookie batter and baking, then drizzling caramel sauce over top. Like me, do you have fond memories of eating caramel-coated apples as a kid? If the answer is yes, then you are going to LOVE this recipe. They’re easy to prepare, using purchased caramel sauce. And, I provide detailed step-by-step instructions, so you can rest assured they will come out perfectly every time.

Table of Contents
This post contains referral links for products I recommend. As an Amazon Associate, I earn a small commission on qualified purchases, at no cost to you.
Stuffed Baked Apples You’ll Live For!
Years ago, I was given a recipe for fresh apples stuffed with a cheesecake mixture and then baked. They were very easy to prepare, could be made ahead (my favorite type of dessert) AND were absolutely delicious . Unfortunately, somewhere along the way, I lost the recipe. So, the other day when I saw all these bright, shiny, red apples at the grocery store, I decided to create my own version – and these Caramel Cheesecake Apples are the result.
Stemmed, cored and hollowed out fresh apples (I recommend using Gala, Pink Lady or Braeburn) are stuffed with a cheesecake cookie filling, baked, and then finished with a sweet, creamy caramel sauce and chopped nuts.. They’re perfect for any occasion – whether you’re having a party, celebrating a special birthday, or just enjoying a relaxing weekend evening.
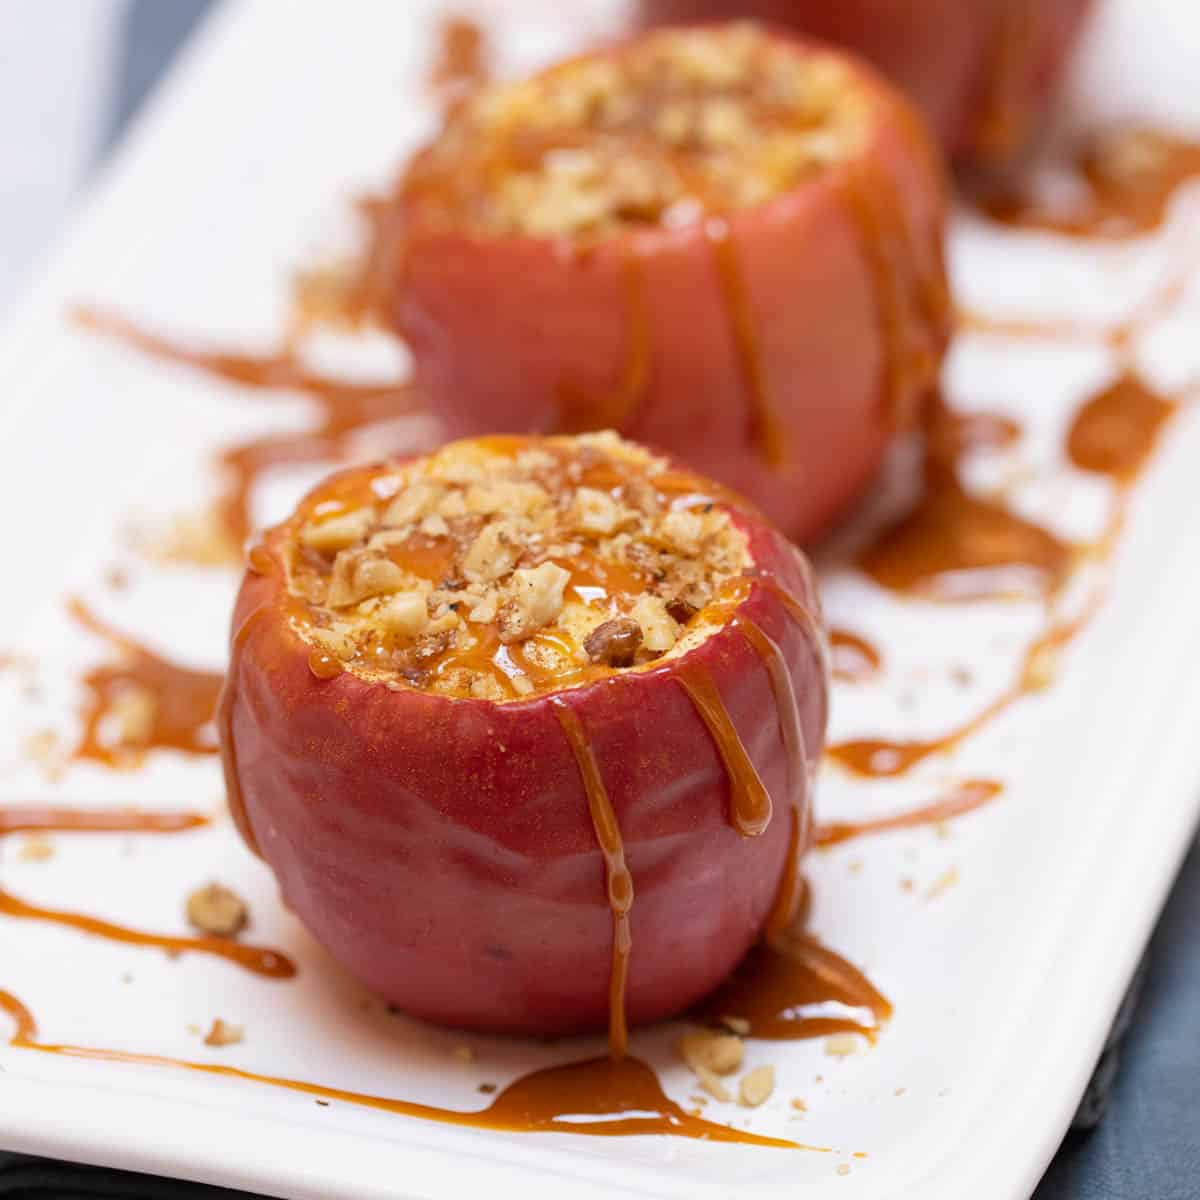
The caramel sauce and nuts on top hide the cheesecake stuffing, so it’s a surprise when you (or your guests) cut into the apple! Caramel Cheesecake Apples are easy to prepare, can be made ahead and are a perfect fall dessert.
Stuffed Apples with Cheesecake Ingredients
Here’s what you’ll need to put together these special apple treats:
- Fresh red apples – Fuji, Honeycrisp, Jonathan, Cortland or Braeburn apples
- Cream cheese
- Granulated sugar
- Large egg
- Whole milk
- Fresh lemon juice
- Lemon zest
- Vanilla extract
- Ground cinnamon
- Prepared caramel sauce (for purchased, I like Mrs. Richardson’s brand)
- Toasted chopped walnuts

How to Make Stuffed Cheesecake Apples
Here’s how to make these impressive and delectable apples:
- Prep oven and baking dish.
Preheat oven to 350 degrees. Lightly butter or line with parchment paper an 8 by 8-inch baking dish. - Core apples.
Cut a small slice (around 1/4-inch) off the top of each apple. If an apple is not sitting straight, carefully slice a small piece off of the bottom to level (otherwise the filling might run out). Scoop out the stem, core and some of the pulp from inside, leaving around a 1/4-inch thick skin. Leave the bottom intact! Each apple cavity should hold at least 1/3 cup (check by filling with 1/3 cup water). Set aside. - Make cheesecake batter.
Using an electric mixer with the paddle attachment, blend together the cream cheese and sugar until creamy and smooth. With the machine running, add the egg, then the milk, lemon juice, zest and vanilla. Beat until well mixed, scraping down the sides as needed. - Fill apples; bake.
Place 1/3 cup of filling in each apple and place in prepared baking dish. Sprinkle with cinnamon and bake for 45 to 50 minutes or until filling is set (firm to the touch). - Rest at room temperature; add toppings and serve.
Remove from oven and bring to room temperature. Let sit at room temperature for 45 minutes to 1 hour. To serve, drizzle with warm caramel sauce and sprinkle with walnuts. Pass additional sauce on the side.
How to Serve Cheesecake Stuffed Apples
To serve, place an apples on individual dessert plates. Drizzle with warmed caramel sauce and sprinkle with toasted chopped walnuts. Pass additional caramel sauce on the side.
How to Store Cheesecake Apples
Store baked apples in an airtight container in the refrigerator. I think they are best eaten within 24 hours of baking.
Cheesecake Stuffed Apple FAQ
Cut a small slice (around 1/4-inch) off the top of each apple. If an apple is not sitting straight, carefully slice a small piece off of the bottom to level (otherwise the filling might run out). Scoop out the stem, core and some of the pulp from inside, leaving around a 1/4-inch thick skin. (I like to use a melon baller.) Leave the bottom of the apple intact.
What apples to use for baking depends entirely on what you are making. For this recipe, I recommend using Fuji, Honeycrisp, Jonathan, Cortland or Braeburn apples.
These stuffed apples are best if eaten within 24 hours of baking, as the apples can start to break down.
When stuffing and/or baking whole, definitely don’t peel them. They would look very unattractive and could fall apart.
For this recipe, you know the apples are done when the filling is set, or firm to the touch.
More Dessert Recipes to Try
- Classic Apple Tarte Tatin
- Apple Bundt Cake
- Individual Plum Tarts
- Pears with Cranberries, Nuts and Cinnamon Whipped Cream
- Individual Butterscotch Pies
- Sticky Ginger Cake

Stuffed Cheesecake Apples with Caramel Recipe
Ingredients
- 4 large red apples, Fuji, Honeycrisp, Jonathan, Cortland or Braeburn
- 8 ounces cream cheese, at room temperature
- 1/4 cup granulated sugar
- 1 large egg
- 2 tablespoons whole milk
- 2 tablespoons lemon juice
- 1 teaspoon lemon zest
- 1 teaspoon vanilla extract
- Ground cinnamon
- caramel sauce, for purchased, I like Mrs. Richardson’s brand, warmed
- walnuts, Toasted chopped
Instructions
- Preheat oven to 350 degrees. Lightly butter or line with parchment paper an 8 by 8-inch baking dish.
- Cut a small slice (around 1/4-inch) off the top of each apple. If an apple is not sitting straight, carefully slice a small piece off of the bottom to level (otherwise the filling might run out). Scoop out the stem, core and some of the pulp from inside, leaving around a 1/4-inch thick skin. Leave the bottom intact! Each apple cavity should hold at least 1/3 cup (check by filling with 1/3 cup water). Set aside.
- Using an electric mixer with the paddle attachment, blend together the cream cheese and sugar until creamy and smooth. With the machine running, add the egg, then the milk, lemon juice, zest and vanilla. Beat until well mixed, scraping down the sides as needed.
- Place 1/3 cup of filling in each apple and place in prepared baking dish. Sprinkle with cinnamon and bake for 45 to 50 minutes or until filling is set (firm to the touch). Remove from oven and bring to room temperature. Let sit at room temperature for 45 minutes to 1 hour.
- To serve, drizzle with warm caramel sauce and sprinkle with walnuts. Pass additional sauce on the side.
Notes
Nutrition
Nutrition information is automatically calculated, so should only be used as an approximation.