When a recipe calls for cooked chicken, boneless, skinless chicken breasts are often the trickiest to get right. I rely on the cooking method braising to keep them tender and juicy every time. This method is easy, quick (25 minutes or less), and also flexible – allowing you to adjust the seasonings to suit your tastes or the dish you’re making. This post walks you through exactly how to braise chicken breasts with confidence.

Note: This post contains referral links for products I recommend. As an Amazon Associate, I earn a small commission on qualified purchases, at no cost to you.
A Quick Look at the Recipe
✅ Recipe Name: Braising Chicken Breasts: Tender and Juicy Every Time
⏲️ Ready In: 25 minutes or less
🥣 Main Ingredients: boneless, skinless chicken breasts, oil, liquid, seasonings
📖 Dietary Info: low fat
♨️ Method: cooktop
🍽️ Yield: 4 chicken breast halves
⭐️ Difficulty: Easy, when you follow my step-by-step instructions and success tips
Summarize and save this content on:
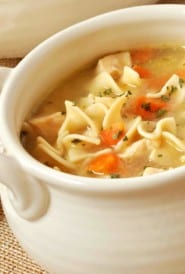
I use this braising method whenever a recipe calls for cooked chicken. It’s the starting point I rely on for my Curry Chicken Salad with Pasta, Chicken Enchilada Casserole, and Chicken Noodle Soup, because the braised chicken breasts stay tender, juicy, and full of flavor. Once you understand the technique, you’ll find yourself using it again and again!
Table of Contents
- A Quick Look at the Recipe
- Why You’ll Love This Cooking Method for Chicken Breasts
- What Does it Mean to Braise Chicken Breasts?
- Why Braising Works for Chicken Breasts
- Best Boneless Chicken Breasts for Braising
- Key Ingredients for Braising Chicken Breasts
- Step by Step: How to Braise Chicken
- Success Tips for Braising Chicken Breasts
- How to Use Braised Chicken
- Braising Chicken Breasts FAQ
- How to Braise Chicken Breasts Recipe
Why You’ll Love This Cooking Method for Chicken Breasts
- Quick. Boneless chicken breasts braise in just 15 to 25 minutes, including prep time.
- Reliable. Gentle heat and a covered pan take the guesswork out of cooking one of the easiest cuts to overcook.
- Flexible. The method works with a variety of liquids and seasonings, so you can adapt it to your tastes or the recipe you’re making.
- Time-tested. Braising is a classic cooking technique that’s been used for generations to gently cook lean cuts of meat.
What Does it Mean to Braise Chicken Breasts?
Braising is a simple two-step method. You start by quickly searing the chicken to develop flavor, then finish cooking it gently in a small amount of seasoned liquid with the pan covered. The chicken isn’t fully submerged – steam does part of the work, along with the simmering liquid. It’s controlled, gentle heat that allows the chicken to cook through without drying out.
⭐️⭐️⭐️⭐️⭐️
Betsy C.
“Thanks so much for all the detail on braising. Tried it last night and my chicken was so tender and flavorful!!”
Why Braising Works for Chicken Breasts
Chicken breasts don’t like high heat or aggressive cooking. Braising gives them a moist, steady environment so they cook evenly and stay tender. The initial sear adds flavor, and the covered pan helps the chicken retain moisture as it finishes cooking. The result is juicy, mild-flavored chicken that works well on its own or as a key ingredient in other recipes.
Why Boneless Chicken Breasts Are the Hardest to Braise Well
Boneless, skinless chicken breasts are very lean, which means there’s little room for error. Cook them too long, and they dry out. That’s exactly why they benefit from braising, a cooking method that relies on gentle, controlled heat and short cooking time. Stop at the right moment, and boneless chicken breasts turn out tender and juicy instead of firm and dry.
Best Boneless Chicken Breasts for Braising
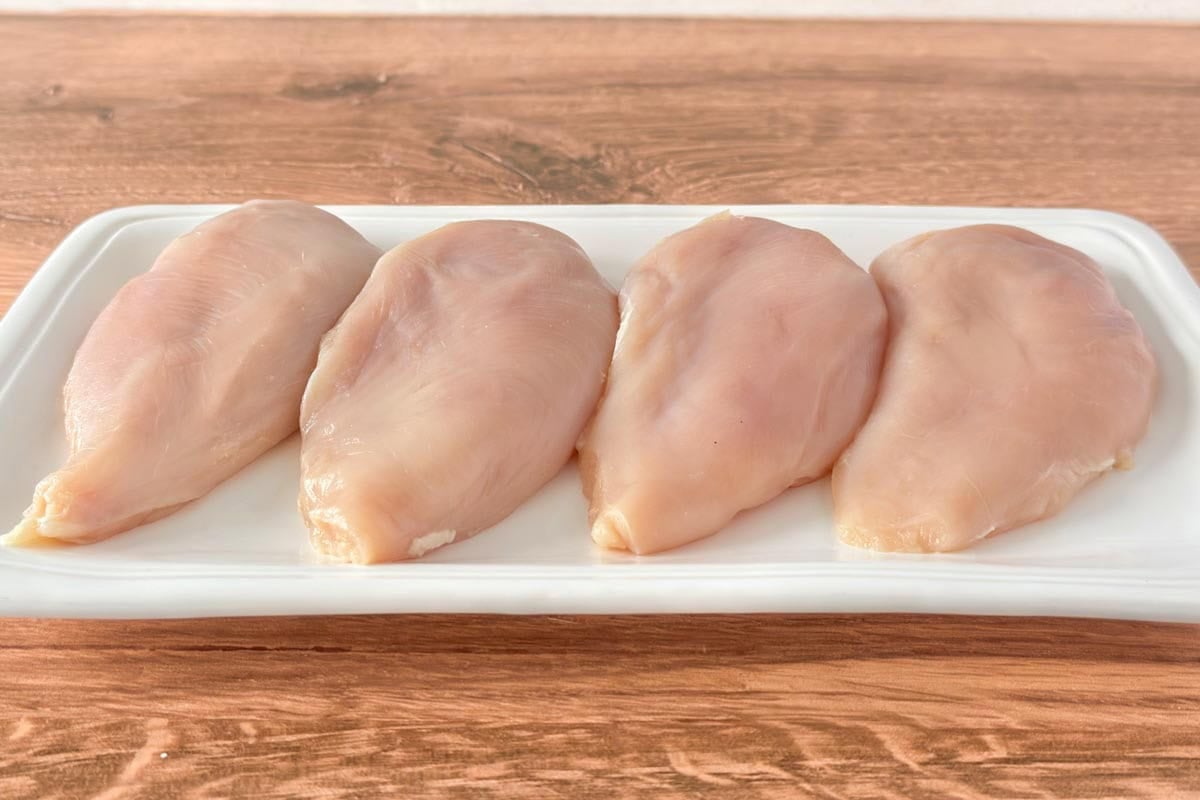
For the best results, choose boneless, skinless chicken breasts that are similar in size and thickness. Even thickness matters more than exact weight, since thinner areas cook faster and are more likely to dry out.
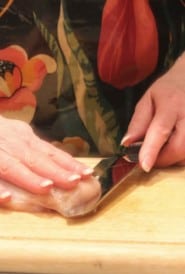
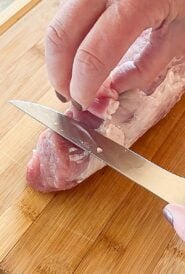
If a breast is much thicker on one end, butterflying the chicken breast is an easy way to even things out and promote more consistent cooking. Gentle pounding on the thicker end can also help, but there’s no need to flatten completely. The goal is simply to help the chicken cook more evenly.
Key Ingredients for Braising Chicken Breasts

Braising relies on three basic components (oil, liquid, seasoning) to cook the chicken, not a fixed list of ingredients. The focus here is on technique, not precise measurements, which makes this method easy to adapt to different recipes and flavor profiles.
1. Oil for searing
A small amount of oil is used to sear the chicken over medium-high heat before it’s braised. Vegetable oil works well, and extra-virgin olive oil can also be used successfully as long as the heat is controlled and the oil doesn’t smoke heavily. The goal is to lightly brown the chicken and build flavor, not to fry it.
2. Best liquids for braising chicken breasts
You can use dry white wine, dry sherry, chicken broth, water, or even tomato juice as the braising liquid. Each adds a slightly different flavor, but the method stays the same. Choose a liquid that complements the dish you plan to use the chicken in.
3. Additional seasonings
Seasonings are optional and easy to modify. Simple aromatics like onion and garlic, along with herbs such as parsley, rosemary, or a bay leaf, add flavor without overpowering the chicken.
➡️ Optional seasoning: kosher salt. Lightly salting the chicken before searing helps build flavor. Go easy (or even omit) if your braising liquid or finished dish is already salty.
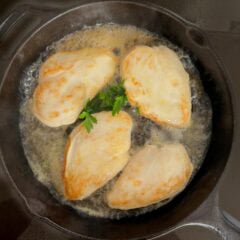
Step by Step: How to Braise Chicken
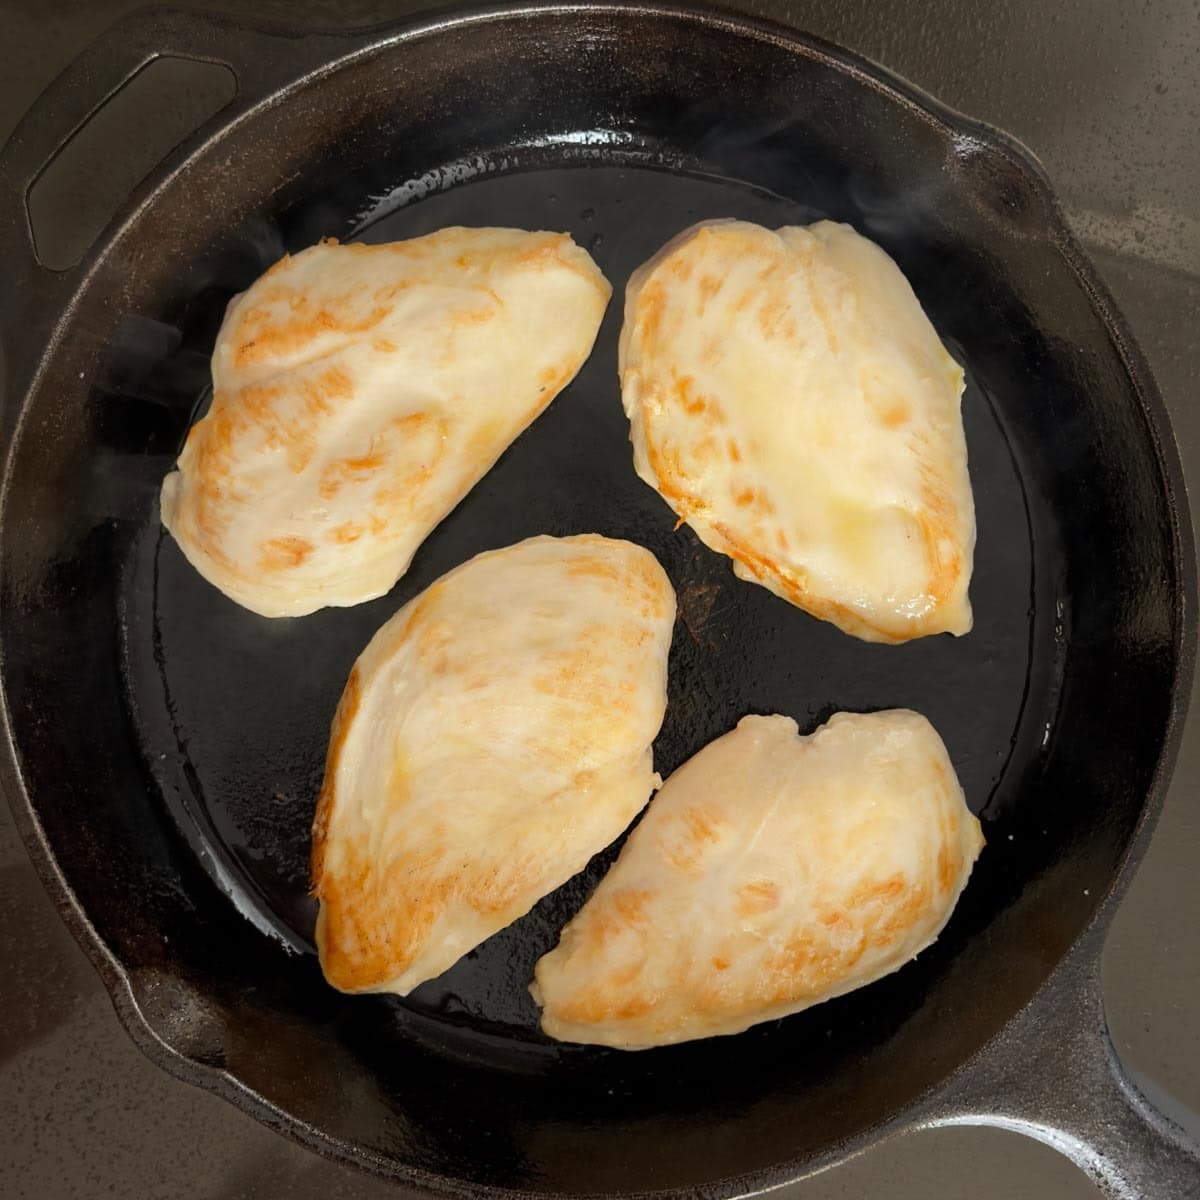
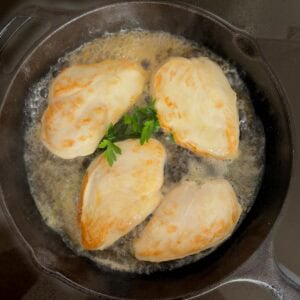
- Coat the bottom of a large, flat-bottomed skillet (cast iron works well) with oil and heat over medium-high heat. Add the chicken breasts in a single layer and cook for about 1 minute per side, just until lightly browned.
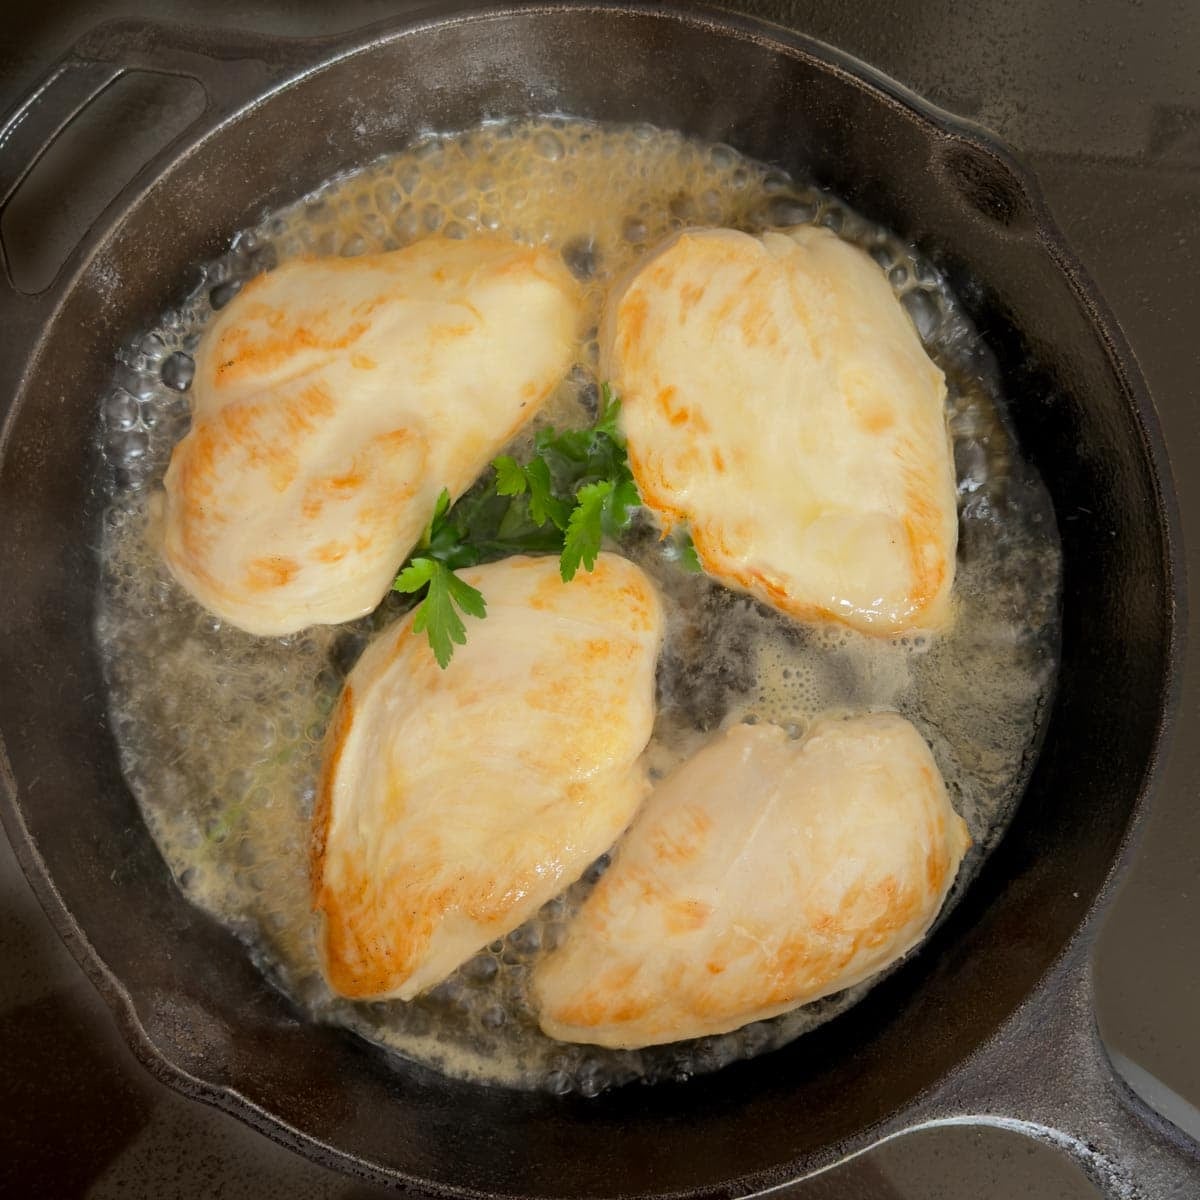
- Add the braising liquid of your choice along with any seasonings. Bring the liquid just to a boil, then immediately reduce the heat to a gentle simmer.
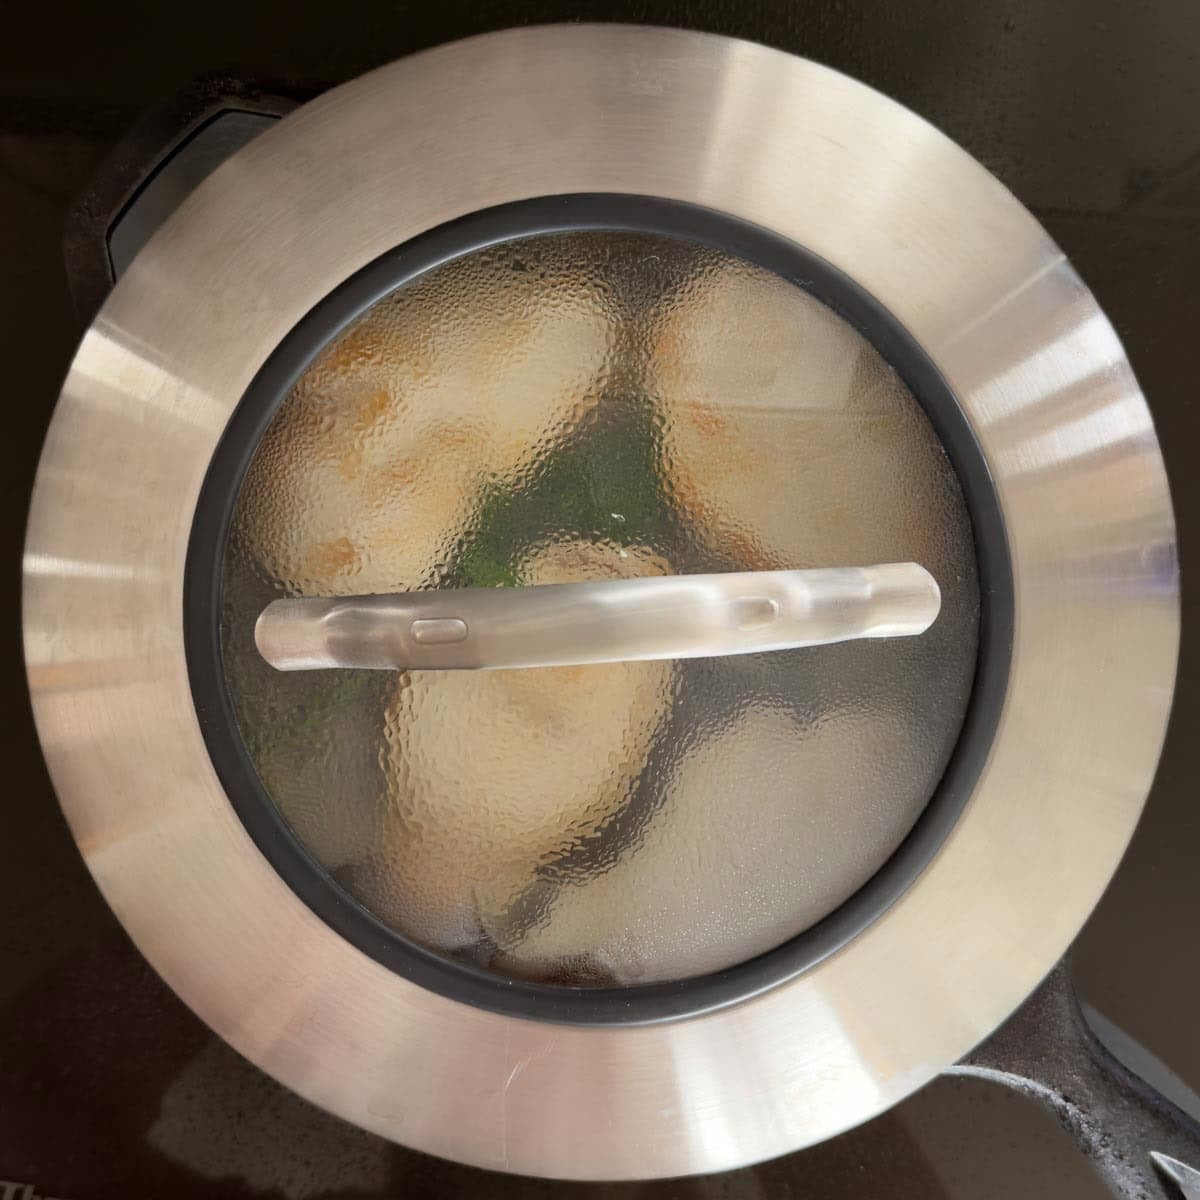
- Cover the pan and cook until an instant-read thermometer inserted into the thickest part of the chicken reads 160–165°F, anywhere from 10 to 20 minutes, depending on the thickness of the breasts.

- Remove the pan from the heat and let the chicken rest in the braising liquid for about 5 minutes.
Last step: Transfer braised chicken breasts to a plate and let them cool until they’re comfortable to handle before slicing or shredding. Alternatively, cool completely, place in an airtight container, and refrigerate until ready to use.
How Long to Braise Chicken Breasts
Boneless chicken breasts can take anywhere from 10 to 20 minutes to braise, depending on their thickness; bone-in chicken breasts take longer, usually around 30 to 40 minutes. Thinner breasts will be done closer to the lower end of that range, while thicker pieces will need a few extra minutes. Cooking longer won’t make them more tender and can dry them out, so start checking early.
How to Tell When Braised Chicken Breasts Are Done
Braised chicken breasts are done when they reach an internal temperature of 160–165 degrees F. Visually, the meat should look opaque throughout and feel tender when gently pressed, not firm. Using an instant-read thermometer is the best way to check doneness; cutting into the chicken releases juices and can dry it out.
Success Tips for Braising Chicken Breasts
- Use low heat. Once the liquid boils, immediately reduce heat to a gentle simmer, which keeps the chicken tender; higher heat can toughen it.
- Cover the pan. Trapped steam helps the chicken cook evenly and stay moist.
- Closely watch the cook time. Boneless breasts cook more quickly than other cuts, and overcooking is the quickest way to dry them out. Test the internal temperature early to be safe.
- Rest cooked chicken briefly in the liquid. About 5 minutes off the heat, resting in the liquid, helps the chicken stay juicy before you remove it to cool.
How to Use Braised Chicken
Tender, moist braised chicken is ideal for most recipes that call for cooked chicken. Here are a few of my favorites:


Braising Chicken Breasts FAQ
Yes. Boneless chicken breasts are very lean, so even a few extra minutes can cause them to become dry. Longer braising times do not make them more tender.
Searing is optional, but recommended. A quick sear adds flavor and color before the chicken finishes cooking gently in the braising liquid.
No, the breasts should not be submerged in the liquid. Unlike poaching (where the chicken is fully submerged), braising uses just enough liquid to gently cook the chicken without muting its flavor.
Braising sears the chicken first and cooks it partially submerged in gently simmering liquid, while poaching cooks the chicken fully submerged without browning first.
More Helpful Cooking Tips


Did you make this recipe?
If you make this recipe, be sure to comment and give it a rating below. Don’t hesitate to ask questions – I’m happy to help!
How to Braise Chicken Breasts
Equipment
Ingredients
- Olive or vegetable oil
- 4 boneless, skinless chicken breast halves, around the same size
- 1/2 cup dry sherry, dry white wine, water, chicken broth, or tomato juice
- Seasonings and aromatics, e.g., herbs (bay leaf, parsley, cilantro, rosemary, etc.), garlic, onion, or shallots
Instructions
- Lightly coat the bottom of a large, flat-bottomed skillet (cast iron works well) with oil and heat over medium-high heat.
- Add the chicken breasts in a single layer and cook for about 1 minute per side, just until lightly browned.
- Add the braising liquid of your choice along with any seasonings. Bring the liquid just to a boil, then immediately reduce the heat to a gentle simmer.
- Cover the pan and cook until an instant-read thermometer inserted into the thickest part of the chicken reads 160–165°F, anywhere from 10 to 20 minutes, depending on the thickness of the breasts.
- Remove the pan from the heat and let the chicken rest in the braising liquid for about 5 minutes.
- Transfer braised chicken to a plate and let it cool just until it’s comfortable to handle before slicing or shredding. Alternatively, cool completely, place in an airtight container, and refrigerate until ready to use.
Notes
Boneless chicken breasts can take anywhere from 10 to 20 minutes to braise, depending on their thickness. Thinner breasts will be done closer to the lower end of that range, while thicker pieces will need a few extra minutes. Cooking longer won’t make them more tender and can dry them out, so start checking early. How to Tell When Braised Chicken Breasts Are Done
Braised chicken breasts are done when they reach an internal temperature of 160–165°F. Visually, the meat should look opaque throughout and feel tender when gently pressed, not firm. Using an instant-read thermometer is the best way to check doneness; cutting into the chicken releases juices and can dry it out. Success Tips for Braising Chicken Breasts
- Use low heat. Once the liquid boils, immediately reduceheat to a gentle simmer, which keeps the chicken tender; higher heat can toughen it.
Cover the pan. Trapped steam helps the chicken cook evenly and stay moist.
Closely watch the cook time. Boneless breasts cook more quickly than other cuts, and overcooking is the quickest way to dry them out.
Rest cooked chicken briefly in the liquid. About 5 minutes off the heat, resting in the liquid, helps the chicken stay juicy before you remove it to cool.
Nutrition
Nutrition information is automatically calculated, so should only be used as an approximation.


this is the cooking This is the method I’ve always used for chicken, minus the searing part. I just plop some xhicken breasts in a pan, add some liquid to create a steam effect once I put the lid on, and then let it cook covered for about 20 mins. Basically the hot steam heat from the water cooks a really moist chicken breat. I’ve never needed searing, I just add a great sauce at the end and voila! Delish. IMO baking or grilling doesn’t work for chicken breast, it gets too dried out.
Is there some way to use the liquid after the chicken is done braising? It seems like I should be able to make some kind of sauce from that golden delicious looking liquid. In my old age, I’m new at cooking so would appreciate any advice. Thank you
Using the braising liquid for a sauce is a great idea! Here’s what I’ve done in another recipe that should work: Stir 1/4 cup white wine (assuming you used 1/2 cup liquid to braise) into the liquid in the skillet, then bring to a boil, scraping any browned bits off the bottom of the pan. Cook for a few minutes to reduce the sauce slightly and concentrate the flavors. Remove from the heat, add 2 tablespoons of butter and stir until melted. Season to taste with kosher salt and ground black pepper. Let us know how it turns out!
thank you for the recipe I will definitely use it and more
I tried this method for braising about 9 boneless skinless chicken breasts. The searing took a bit longer than indicated, about 2 mins each side plus another minute on the edges (sides) of each breast as they were rather thick. I added water & 2 Bay leaves , covered it & about 18 mins. later had some really tasty chicken. I was totally impressed because I never thought chicken could taste so good made with no salt or other seasoning (besides the Bay leaves that simmered in the braising water. So delicious, plain old chicken at its best! Thank you for the recipe.
Thank you Robin! I’m so happy to hear you found our method for braising chicken breasts helpful.
When you say 165 degrees – it that C or F?
165 degrees F. I’ll add that to the post!
Thank you for the braising tip for chicken breast. My enchiladas will be tasty.
You’re welcome!
Thanks for the excellent tips!!
You’re welcome!
Thanks for the basic overview of braising. Answered my questions!
You’re welcome. I’m pleased to hear you found my tips helpful.
Thanks so much for all the detail on braising. Tried it last night and my chicken was so tender and flavorful!!
Thanks Betsy – I’m so happy to hear you found my braising tips useful!
This was so easy and turned out great. I had four 2-day lightly dry-brined chicken breasts in my fridge that I needed to cook up pronto. This is going to make fabulous shredded BBQ chicken sandwiches among other things. Thanks for the directions. This one’s a keeper.
Thanks Elle! So glad you liked our Braising tips. And the BBQ chicken sandwiches sound delicious.
A great, quick way to serve a chicken breast!! Very versatile as you can use a variety of liquids… wine, broth, etc. and many different herbs! THANKS!
You’re welcome!